Advanced Integration Settings
Every integration in Opsgenie has two settings page. One of them is the simple settings (which you see by default), and you can switch over to the advanced view using the button on the top right:

The first time you do that, you might feel a bit overwhelmed by the available options - and you are right to feel that. It's an immensely powerful and flexible framework, with a lot of options to customize and personalize your alerting flow. Understanding and using these options will make your incident management processes much more efficient - it helps you to grab only the necessary information, leaving the junk behind and also empowers you to intelligently route and build your alerts based on the original content.
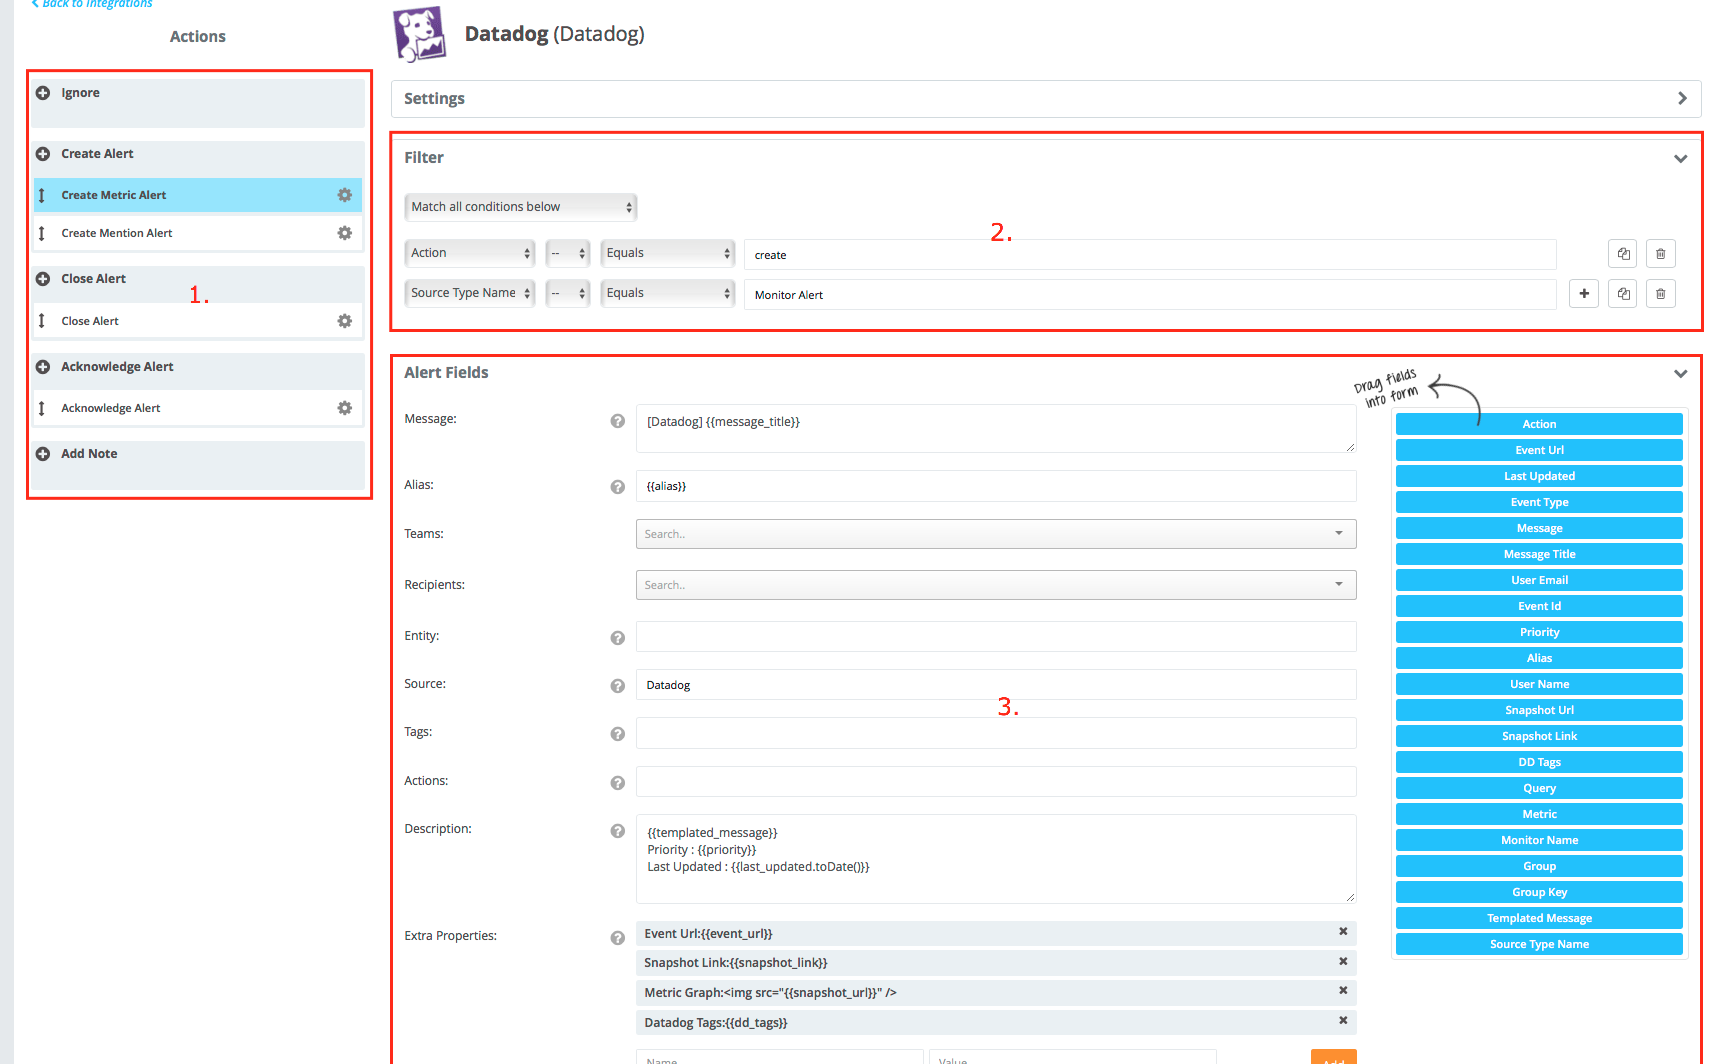
There are three main pillars in the handling process, and in this article, I'll walk you through these. To visualize it before I start, take a quick look on the picture below. Actions > Filters > Alert Fields

The rules on the left side are responsible for the action processing (1.). Every time data lands on the endpoint (or email box), these rules are matched to the data in a top-down order. Each of these rules has a filter section (2.). The first rule which is matching your alert (top-down, don't forget!) will execute the action associated with it. The alert fields section in our example is the details of that action - your alert will be created according to the template capture in the Alert Fields section. Let's go a bit deeper:
1. Action Processing
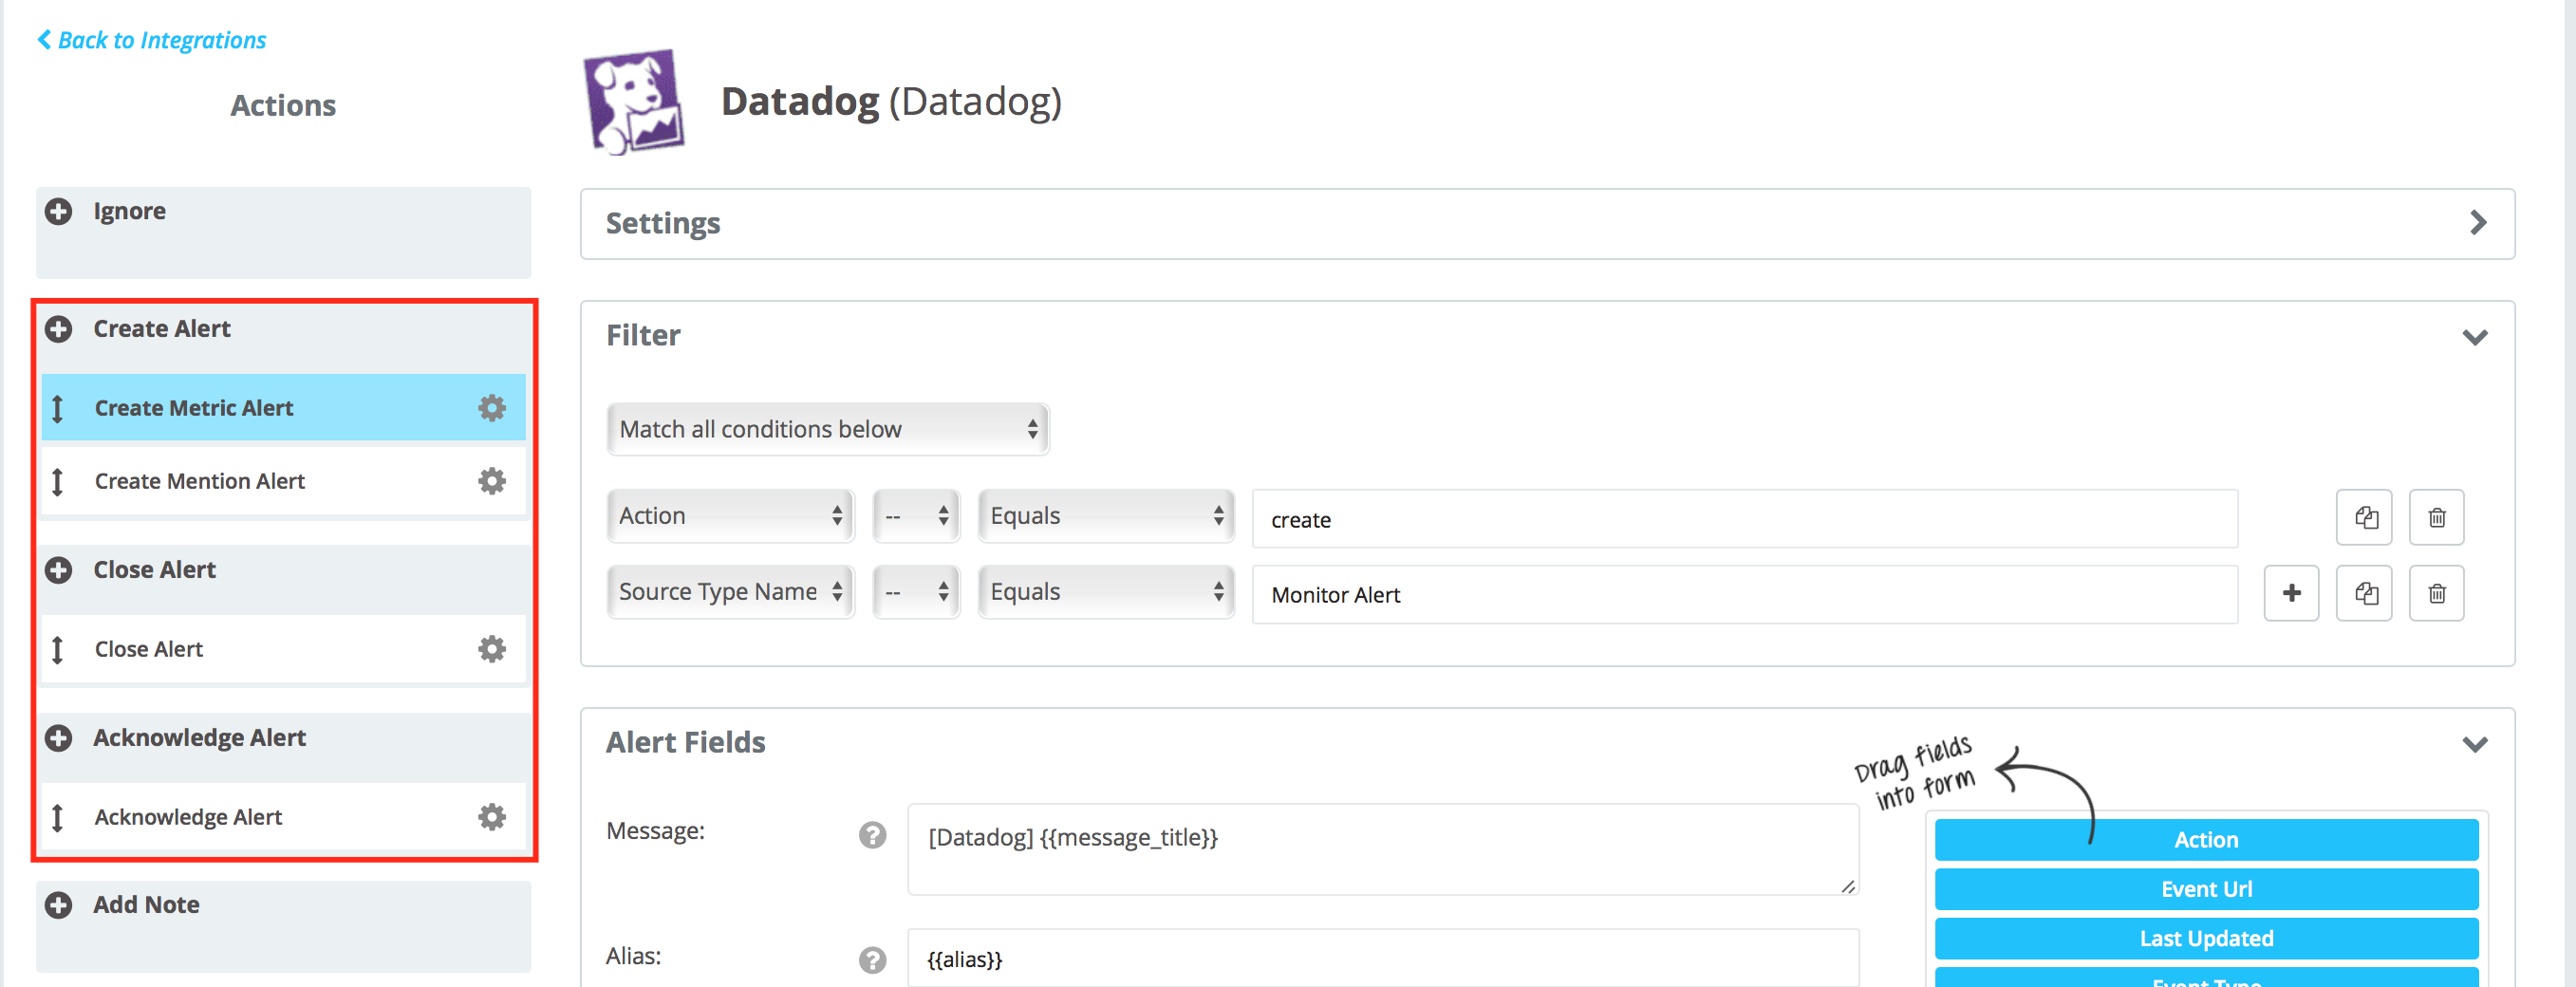
Integration advanced settings consist of many different alert scenarios. These scenarios are called "Actions"; and they specify how and when alerts can be created, closed, acknowledged. etc. There are default actions provided by Opsgenie for every integration; but you can customize them and add as many actions of your own as you like. You can, for example, have three Create Alert actions; which means the webhook data that comes to Opsgenie will be evaluated against these three scenarios in order; and if one of them has a match a new alert will be created.
Example: as you can see on the following screenshot, our default Datadog integration has 4 different rules for 3 actions - create, close and acknowledge:

If the payload matches the condition in the first rule (which you see in the picture) - "Action=Create AND Source Type Name=Monitor Alert" - then the alert will be created according to the alert fields section. If the incoming data does not match the rule, Opsgenie will try to match it with the second Create Alert rule, and so on.
2. Action Filters
As mentioned before - every action has a filter section. Opsgenie processes every incoming data associated with your integration; and evaluates them against your integration's actions for execution. Remember that integration actions have a processing order, and at most one action can be executed by a single request. If the first action's condition set, in other words Filter, does not match the incoming payload, Opsgenie moves on to the next action in line and evaluates its Filter. If an action's Filter matches the data, Opsgenie executes that action and ends the processing on that particular webhook. If no matching action is found, nothing happens.
Pre-canned integration has a list of prepared filter options - the most common ones are available, tailored to the integration you chose.
To learn more about Action Filters and see an example, please visit the full documentation here.
3. Alert Fields
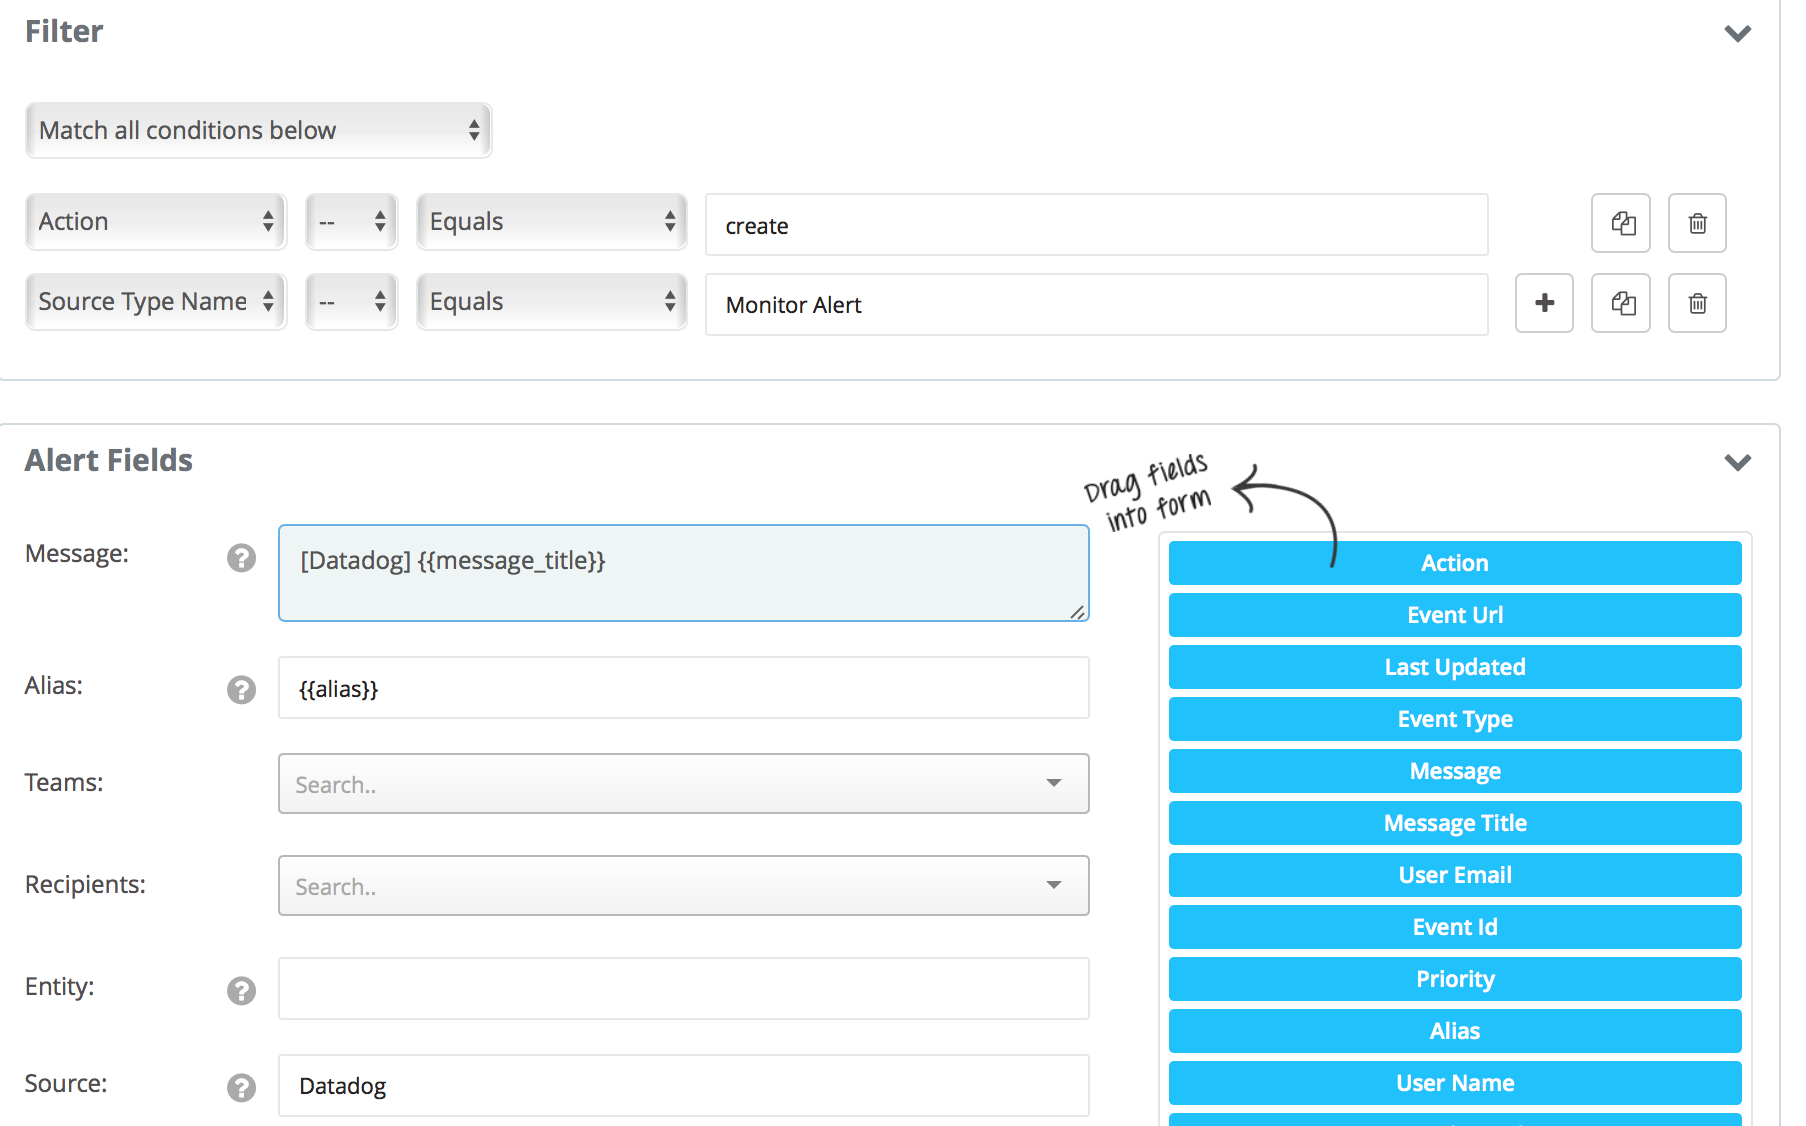
The action will be executed according to the template and settings you capture here. The figure below shows a Create Alert action's Filter. Its condition match type is set to 'Match All conditions'; so if the variable 'Action' in the incoming data is equal to 'Create' and the 'Source Type Name' variable equals 'Monitor Alert', then an OpsGenie alert will be created according to the setup specified in the Alert Fields; and the processing will end there.

On the right side, you see draggable fields (those blue boxes), and you see these dynamic fields captured in some of the default alert fields (those inside the curly brackets). Using these, Opsgenie parses your data to construct rich and informative alerts. You can use dynamic fields to customize alert properties - basically automatically parsing out a variable from the payload, everytime you create an alert according to this "Alert Fields" section!
You don't need the whole variable? Need only a part of the data (like a certain part of an email subject)? No worries - we provide a large list of string processing methods. Please visit this page to understand how that works and to see the list of available options.
Take away
Using the advanced settings of the integration will empower you to fully customize your alerting. You can define when the system should create an alert when it should execute a close action, acknowledge an alert automatically or add a note.
The framework also enables you to parse out anything from your webhook data, and use it dynamically to build your alert content.
The rules are executed in a top-down order, and the first matching rule will execute - no further rules are evaluated.
Turn into an integrations pro
Here is a list of additional, in-depth documentation to help you customize your alerts and create a more efficient process for your team:
Updated 6 months ago
