Microsoft SCOM Integration
Microsoft System Center Operations Manager (SCOM) is a state, health, and performance monitoring infrastructure for Microsoft Windows environments. SCOM ensures the predictable performance and availability of applications and offers monitoring for data centers and the cloud, both public and private.
What does Opsgenie offer to SCOM users?
Integrate SCOM with Opsgenie to forward both Operations Manager alerts and updates to Opsgenie and benefit from Opsgenie's actionable alerts, powerful on-call schedules, escalations and reporting services. Microsoft System Center Operations Manager forwards alert events to Opsgenie to create alerts and acknowledge, close, and add notes to them using PowerShell. Benefit from Opsgenie's Alert De-Duplication using SCOM integration.
Functionality of the integration
- When an alert is created on SCOM, an alert is created in Opsgenie automatically through the integration.
- When an alert is resolved or closed on SCOM, the related alert is closed in Opsgenie.
- When an alert is acknowledged on SCOM, the related alert is acknowledged in Opsgenie.
Setup instructions for Microsoft SCOM Integration:
This guide was prepared using Windows Server 2012 R2 and SCOM 2012 R2; but other recent versions should also work.
Add SCOM Integration in Opsgenie
- Open Integrations page, type SCOM to the search field and click Add on the SCOM.
An alternative for this step is to add the integration from the Team Dashboard of the team which will own the integration. To add an integration directly to a team, navigate to the Team Dashboard and open Integrations tab. Click Add Integration and select the integration that you would like to add.
For Free and Essentials plans, you can only add the integrations from the Team Dashboards, please use the alternative instructions given above to add this integration.
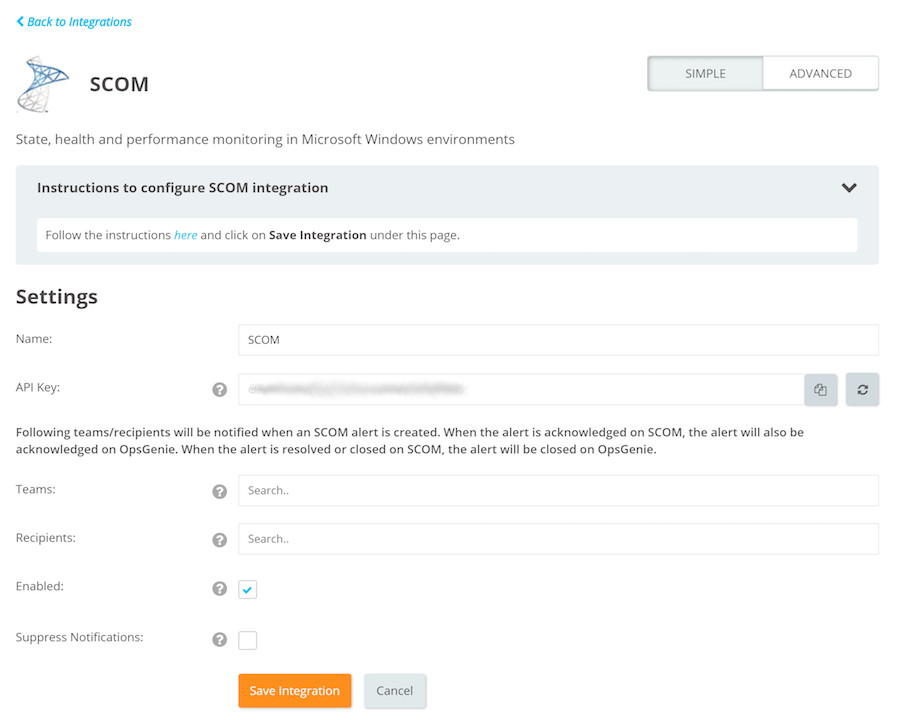
- Click Save Integration.
- Copy the URL provided in the instructions.
- To modify default rules for the "SCOM Integration", click on Go to Advanced Settings.
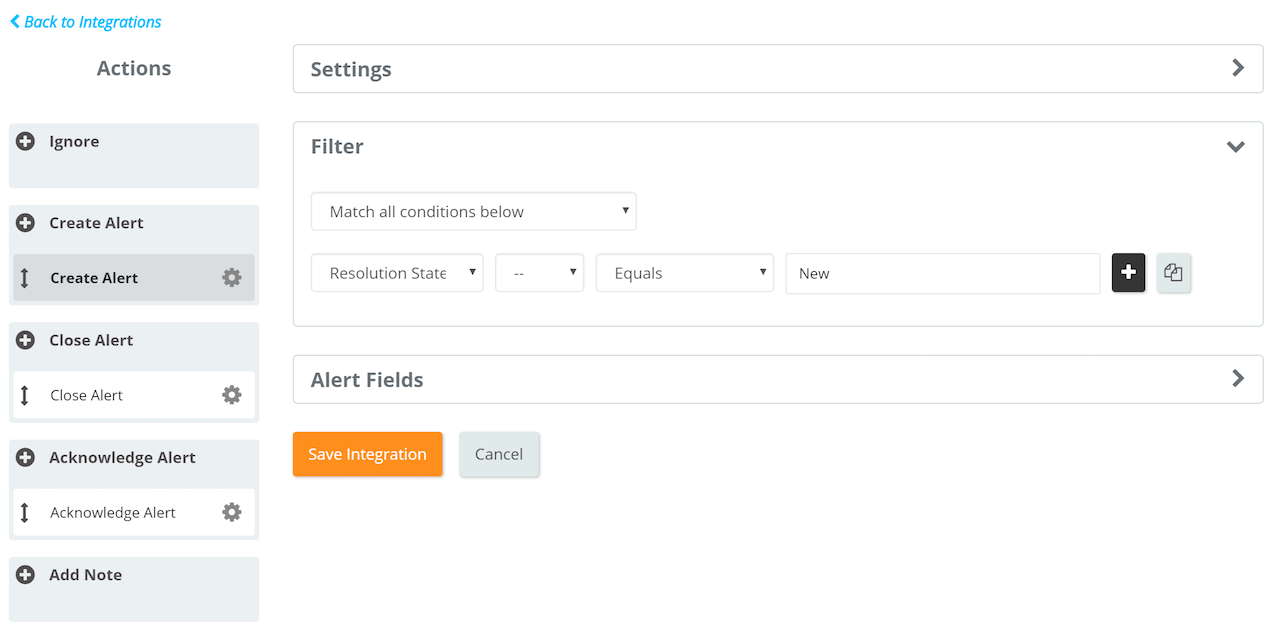
Create/edit conditions for filtering SCOM alerts on Filter segment.
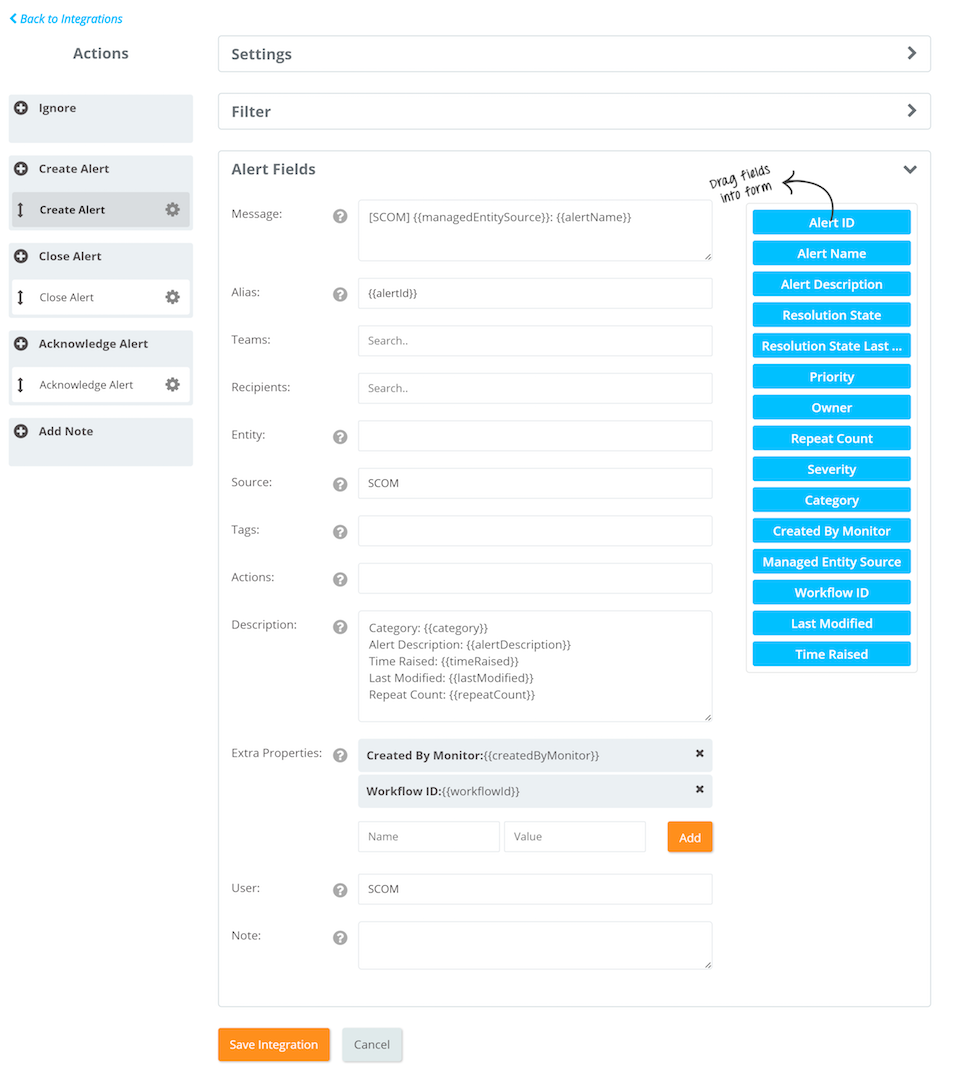
Modify fields for the alerts generated by SCOM using Alert Fields segments.
Configuration on Microsoft SCOM
- Create a new folder with name opsgenie under your root scripts directory. Resulting directory is C:\scripts\opsgenie
- Download Opsgenie's SCOM PowerShell Script and place it to the directory created in the previous step. Make sure that the name of the script file is opsgenie.ps1 and the final path to the file is C:\scripts\opsgenie\opsgenie.ps1
Please update your OperationsManager module's path in script by changing the path in the line:Import-Module "C:\Program Files\Microsoft System Center 2012 R2\Operations Manager\Powershell\OperationsManager\OperationsManager.psm1"
Minimum required Powershell version for the script to be able to work is 3.0. If a version below 3.0 is being used, the Powershell Script code for converting the values into JSON and posting the HTTP request to Opsgenie should be developed by the user's side.

- Open the script and paste the URL that copied from the instructions into the URL parameter value. Save the file.

- Open the System Center Operations Manager console.
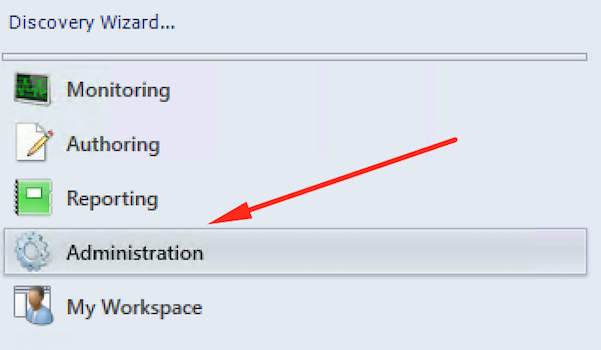
- Click on Administration from the bottom-left panel.
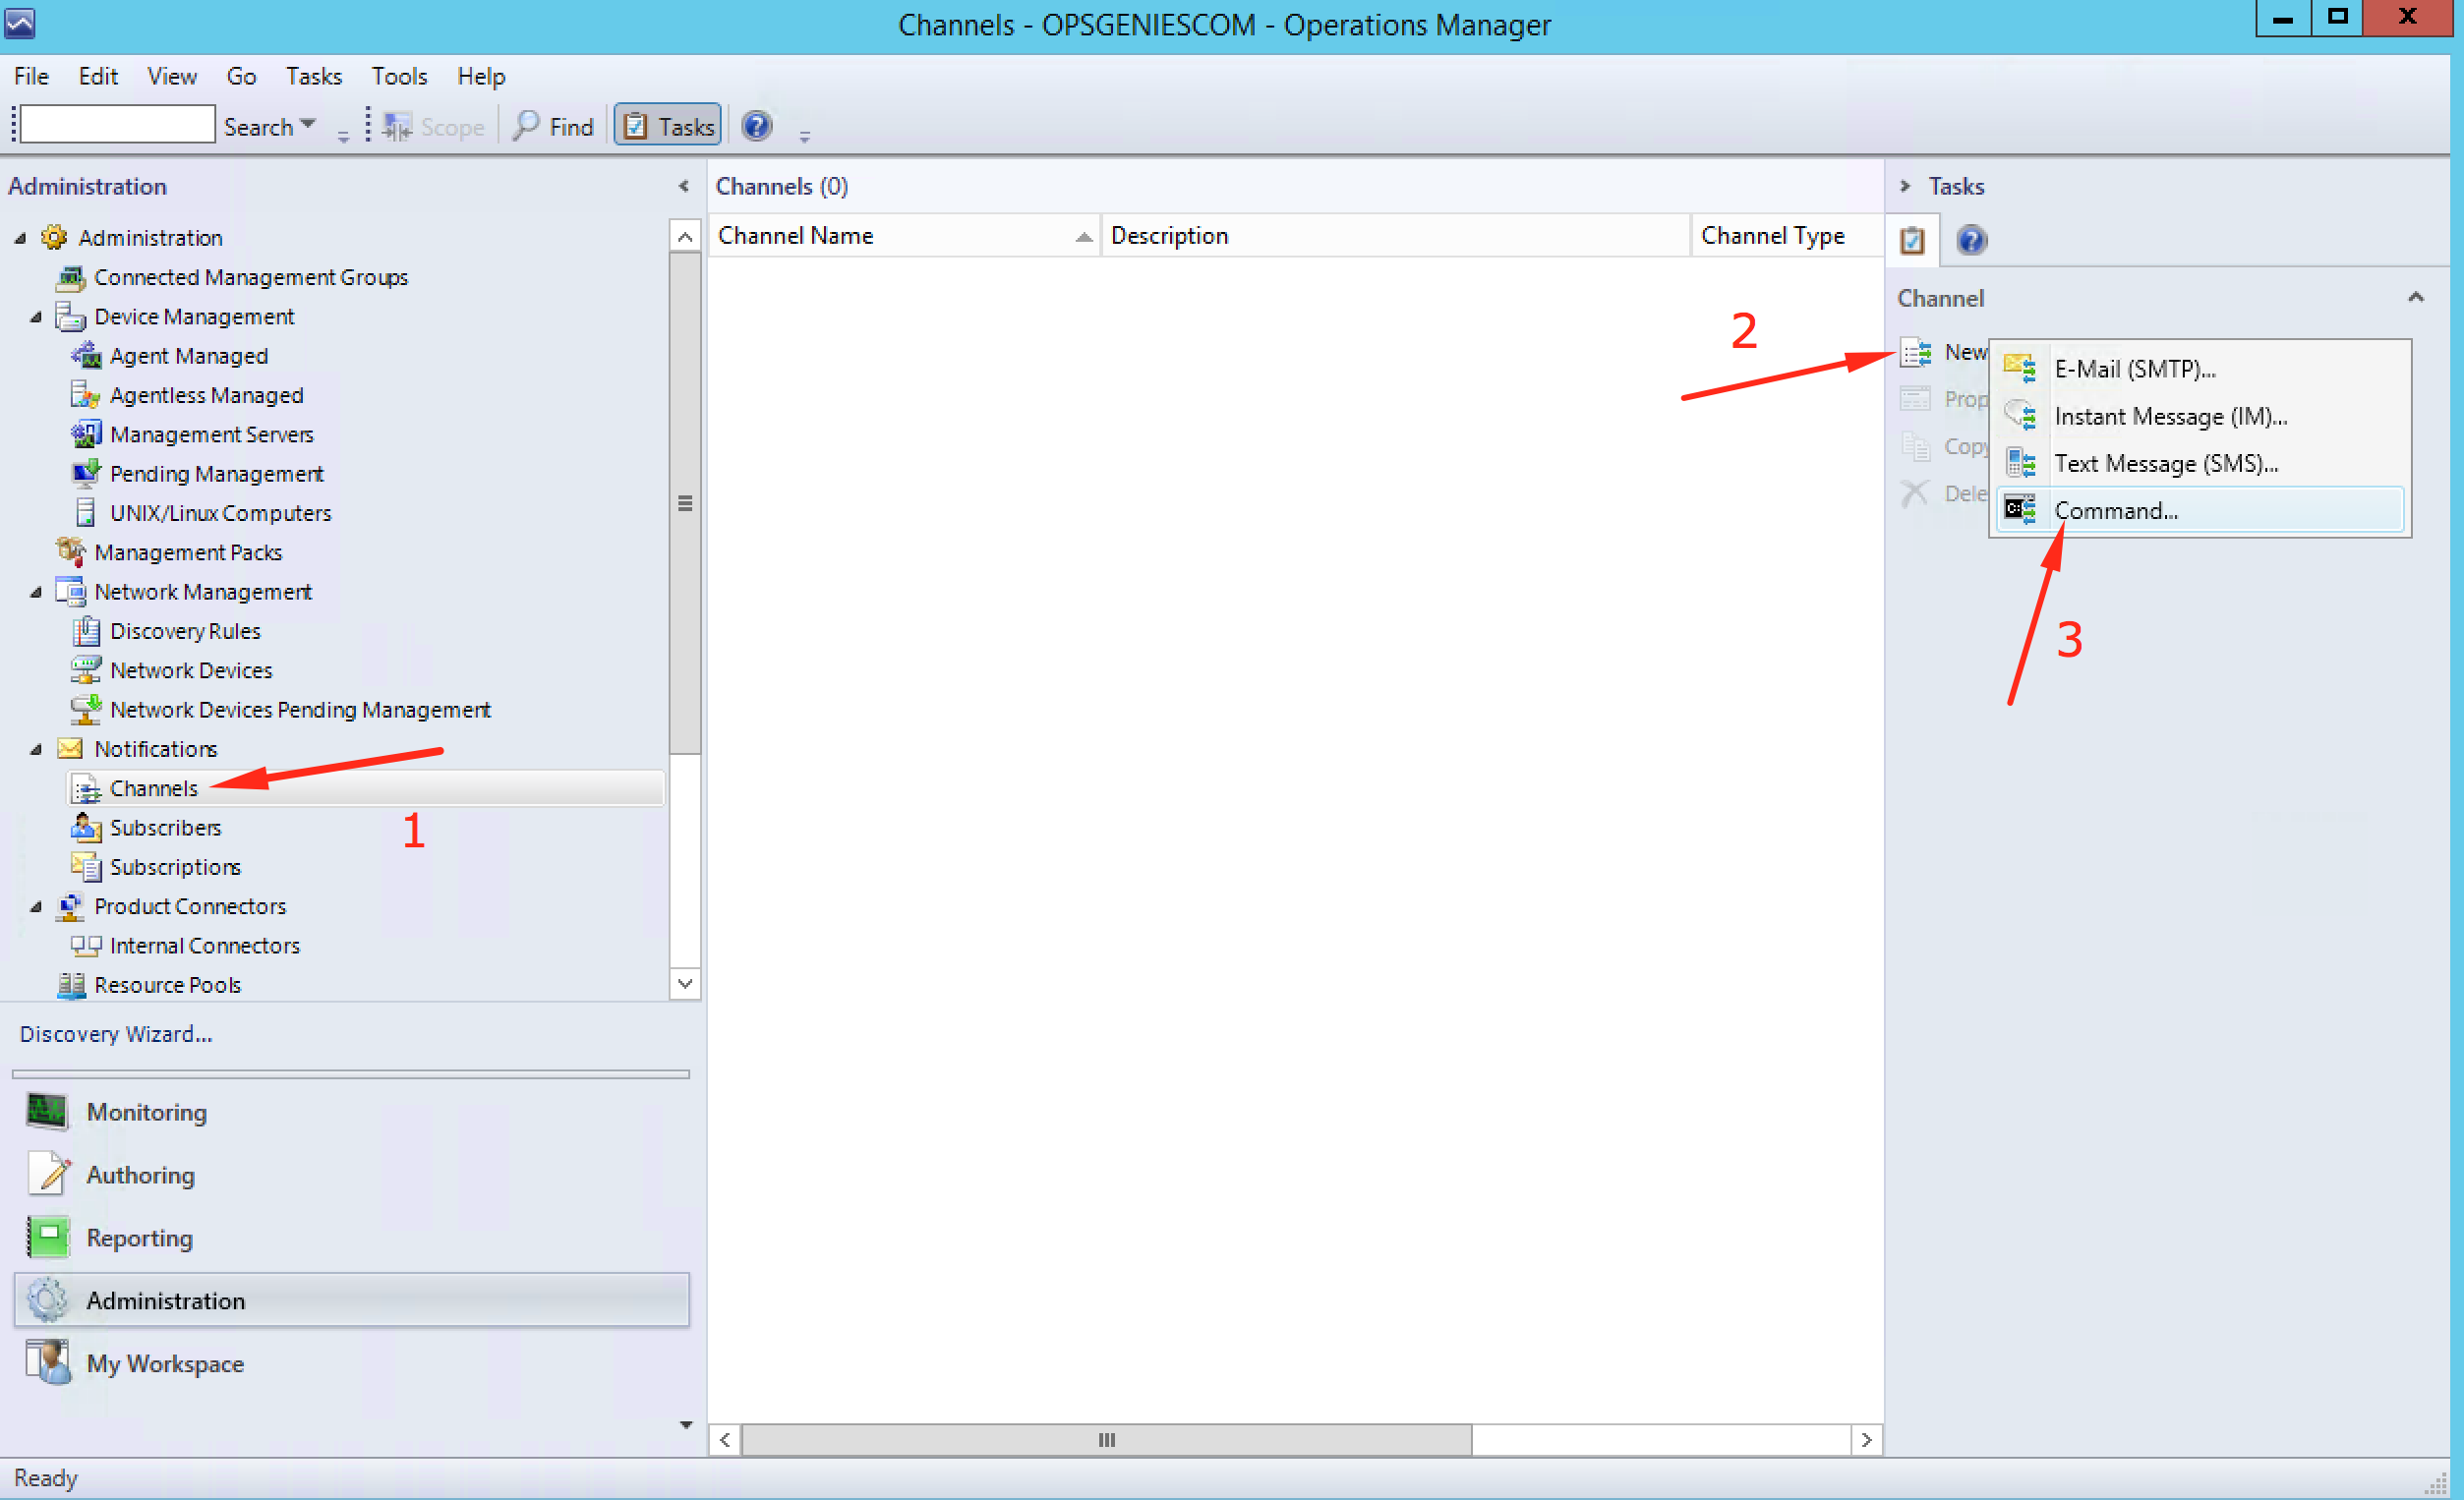
- Select Channels under the Notifications menu from the left panel.
- Click New from the right panel to add a new notification channel and select Command from the resulting list.
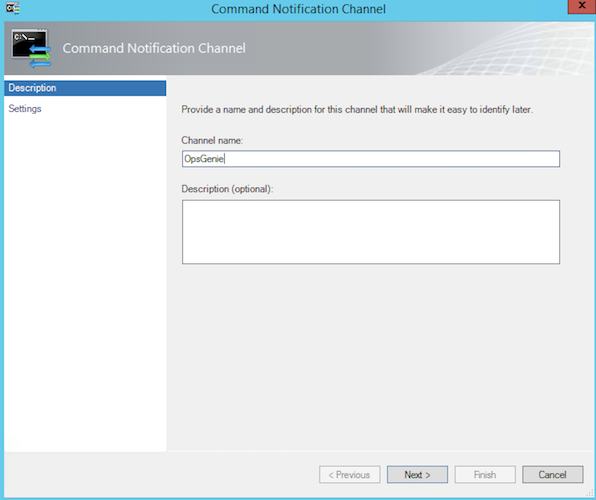
- Write Opsgenie to the channel name and click Next.
- Write $PsHome to the PowerShell to learn the PowerShell Home folder.

- Write the file path of powershell.exe under the PowerShell Home folder to the Full name of the command file field. The result is the following for almost all cases:
c:\windows\system32\windowspowershell\v1.0\powershell.exe
- Copy and paste the following into the Command line parameters field. Make sure to replace Your_API_Url with the integration API URL that is provided.
"C:\scripts\opsgenie\opsgenie.ps1" -Url "YOUR_API_URL" -AlertID "$Data[Default='NotPresent']/Context/DataItem/AlertId$" -CreatedByMonitor "$Data[Default='NotPresent']/Context/DataItem/CreatedByMonitor$" -ManagedEntitySource "$Data[Default='NotPresent']/Context/DataItem/ManagedEntityDisplayName$" -WorkflowId "$Data[Default='NotPresent']/Context/DataItem/WorkflowId$" -DataItemCreateTimeLocal "$Data[Default='NotPresent']/Context/DataItem/DataItemCreateTimeLocal$" -ManagedEntityPath "$Data[Default='NotPresent']/Context/DataItem/ManagedEntityPath$" -ManagedEntity "$Data[Default='NotPresent']/Context/DataItem/ManagedEntity$" -MPElement "$MPElement$"- Write the PowerShell Home folder path into the Startup folder for the command line field. Make sure to add \ to the end of this path. This path is the following for almost all cases:
c:\windows\system32\windowspowershell\v1.0\
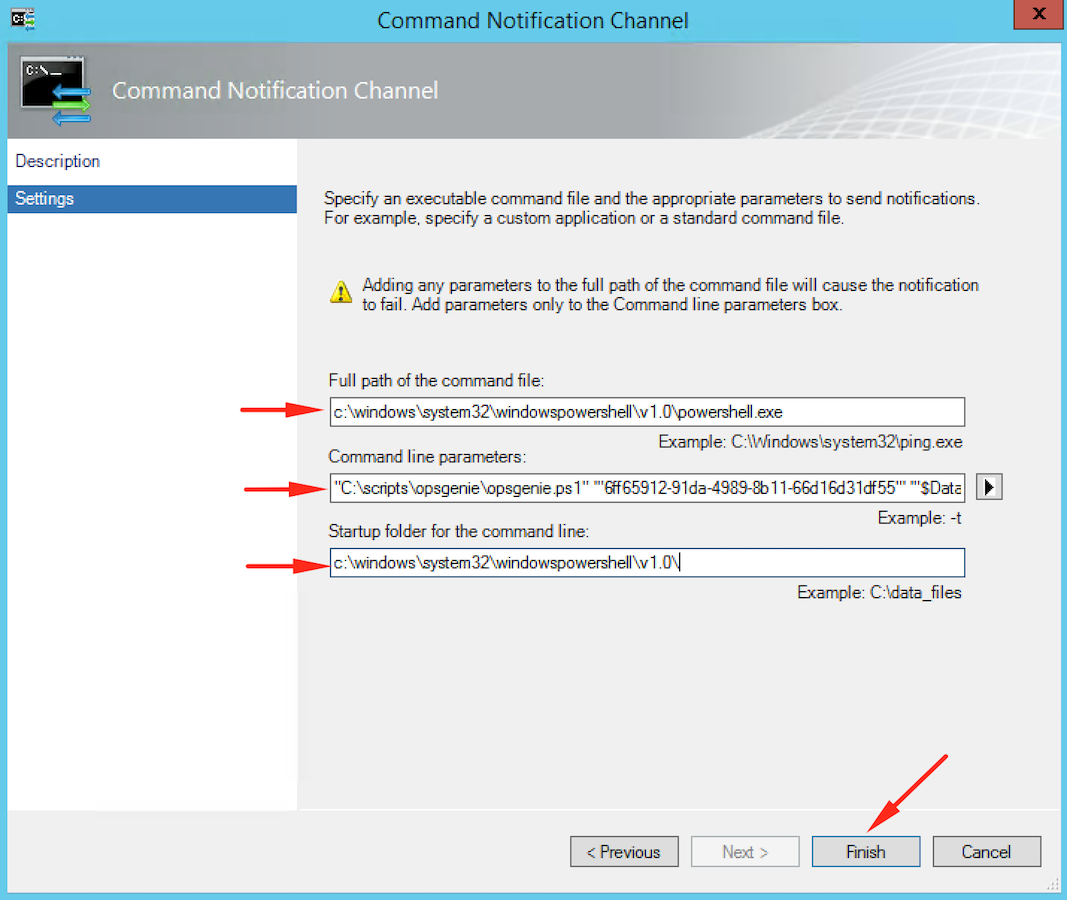
- Click Finish.
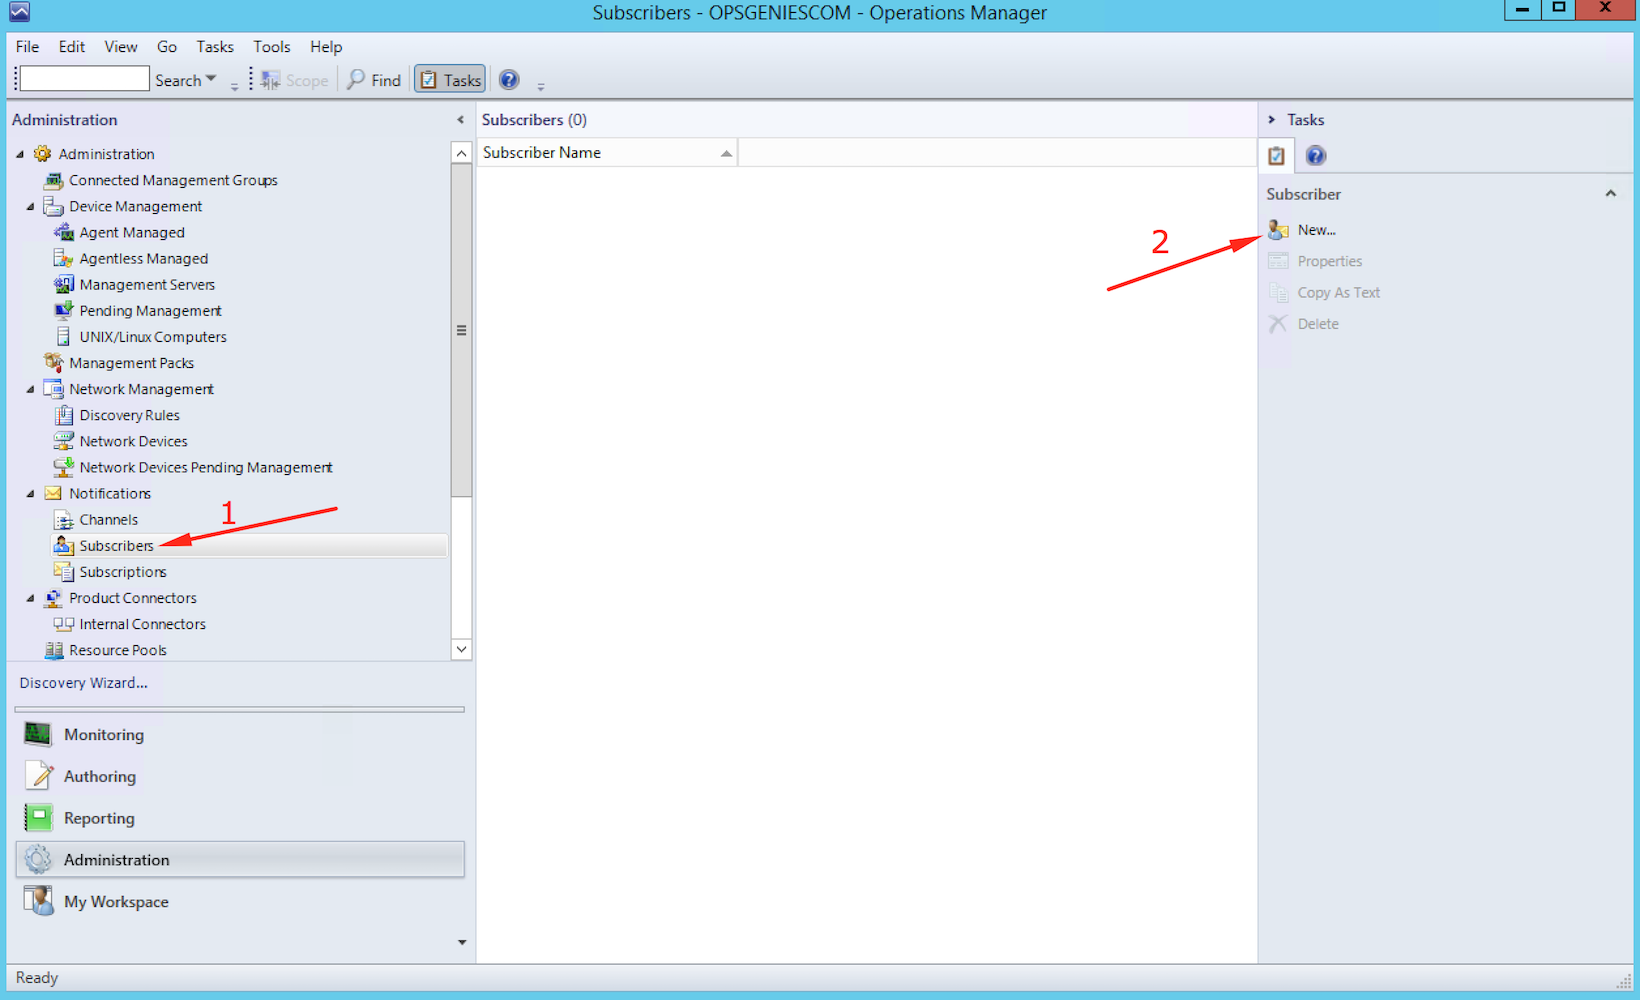
- Select Subscribers under the "Notifications" menu from the left panel and click on New from the right panel.
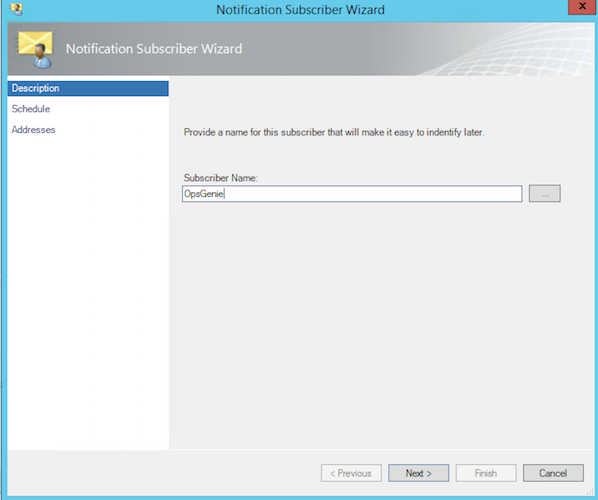
- For the "Description" step; write "Opsgenie" to the "Subscriber Name" field and click Next.
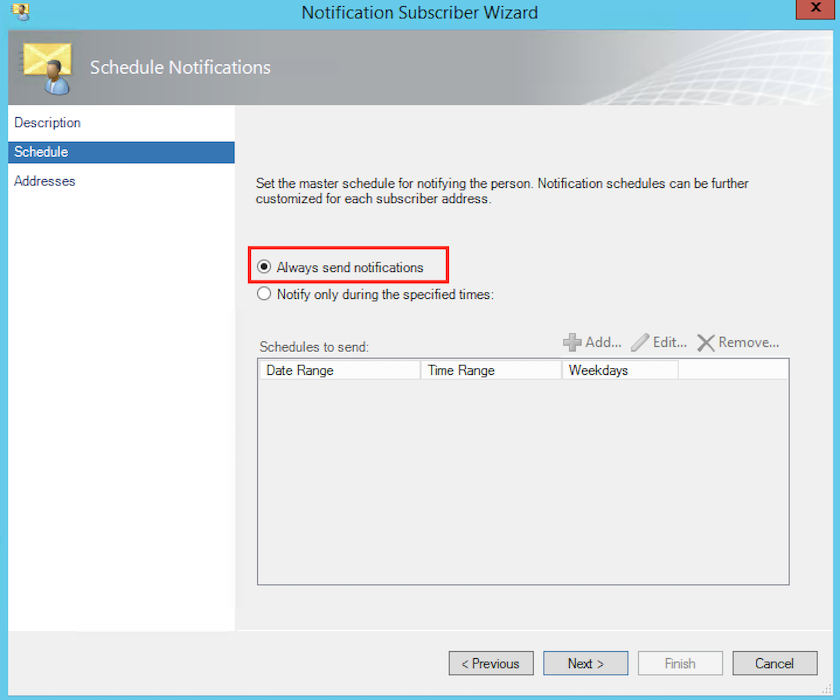
- For the "Schedules" step, select Always send notifications and click Next.
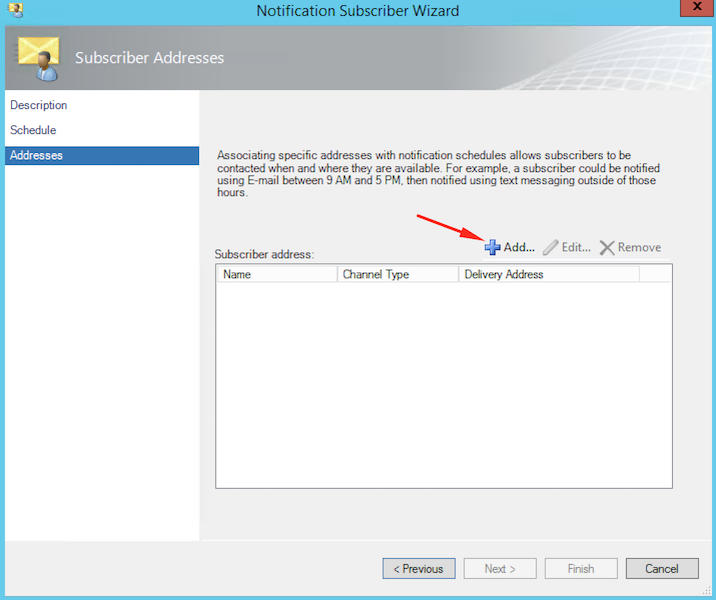
- For the "Addresses" step, click Add.
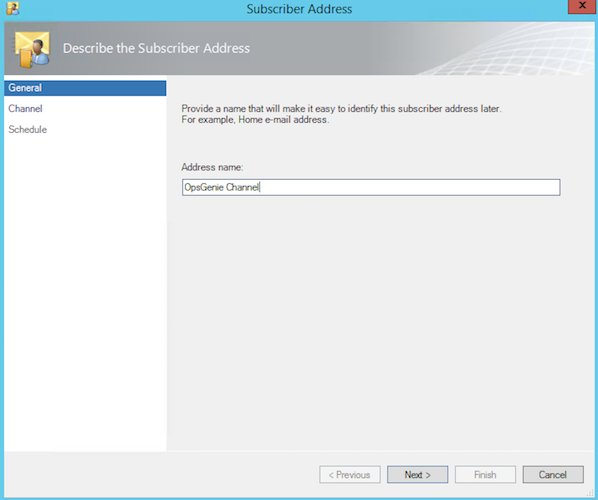
- For the "Subscriber Address" wizard; write "Opsgenie Channel" to the "Address name" field and click Next.
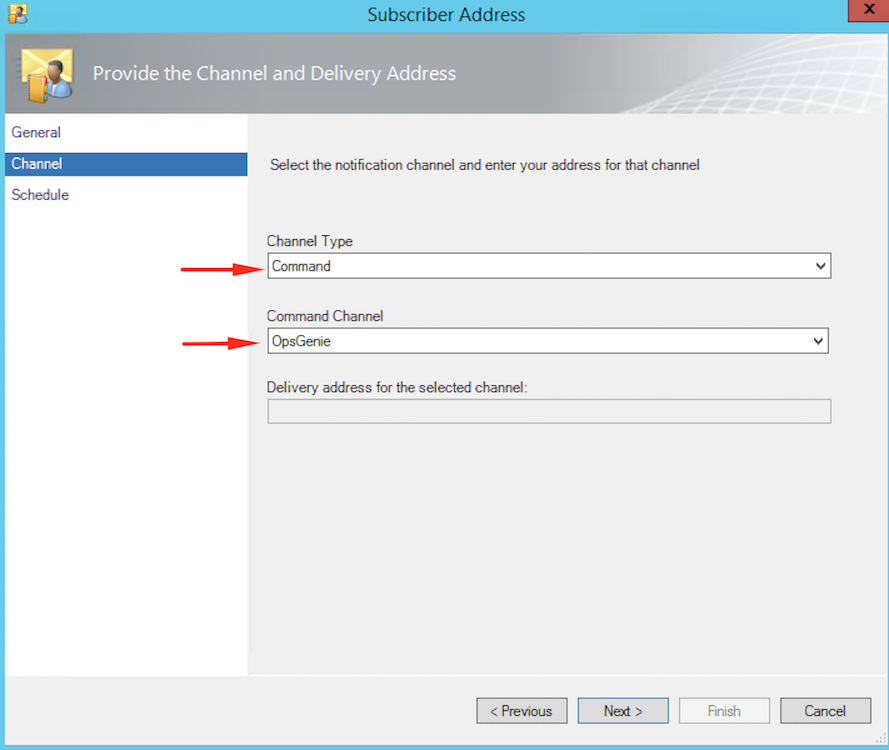
- Use the drop down menu under "Channel Type" and select Command from the list.
- Use the drop down menu under "Command Channel" and select Opsgenie from the list. Then click Next.
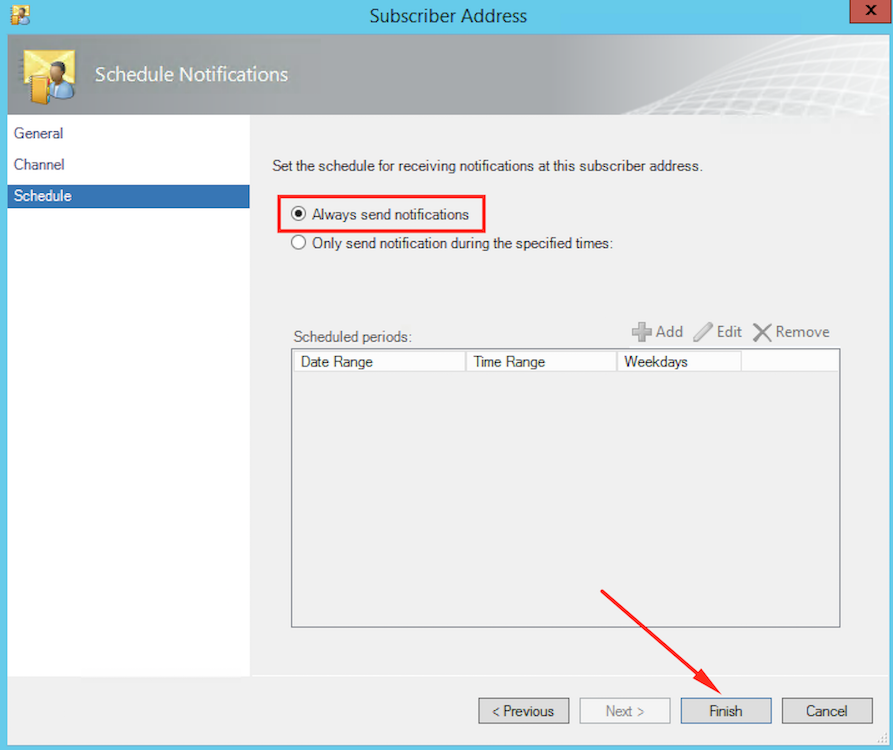
- Select "Always send notifications" and click Finish.
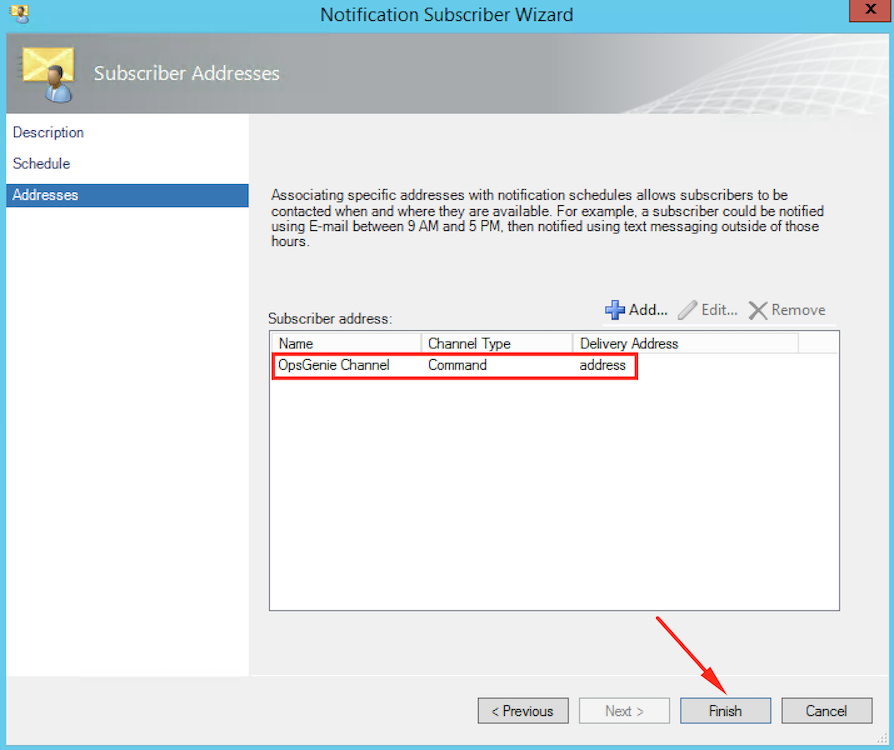
- "Opsgenie Channel" is listed under "Subscriber address" section. Click Finish
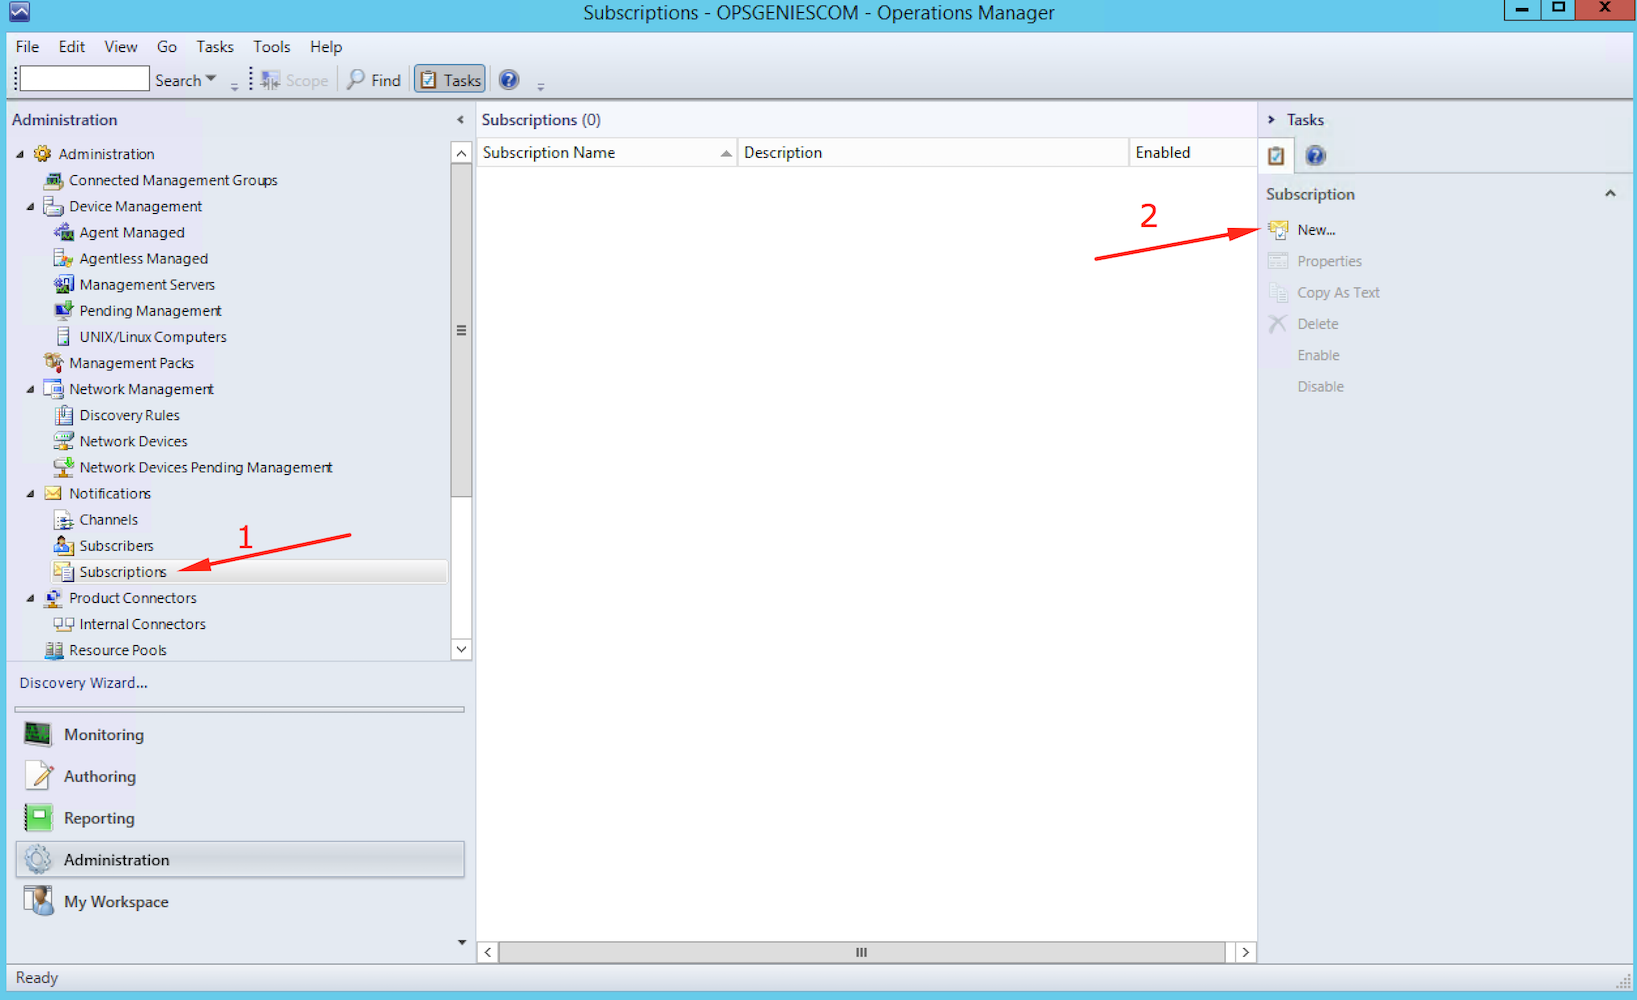
- Select Subscriptions under the "Notifications" menu from the left panel.
- Click New from the right panel.
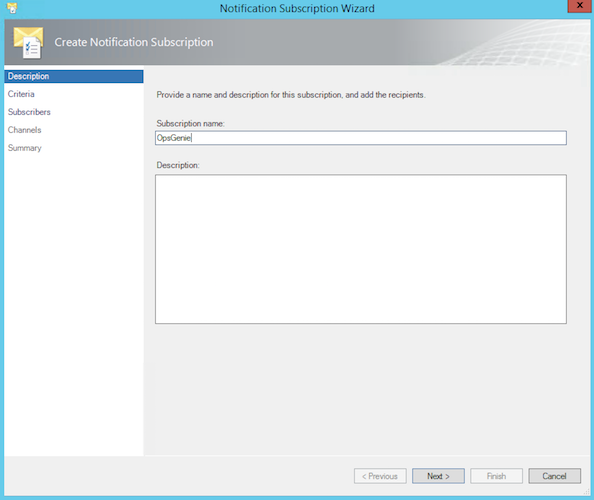
- For the "Description" step, write "Opsgenie" in the "Subscription name" field and click Next.
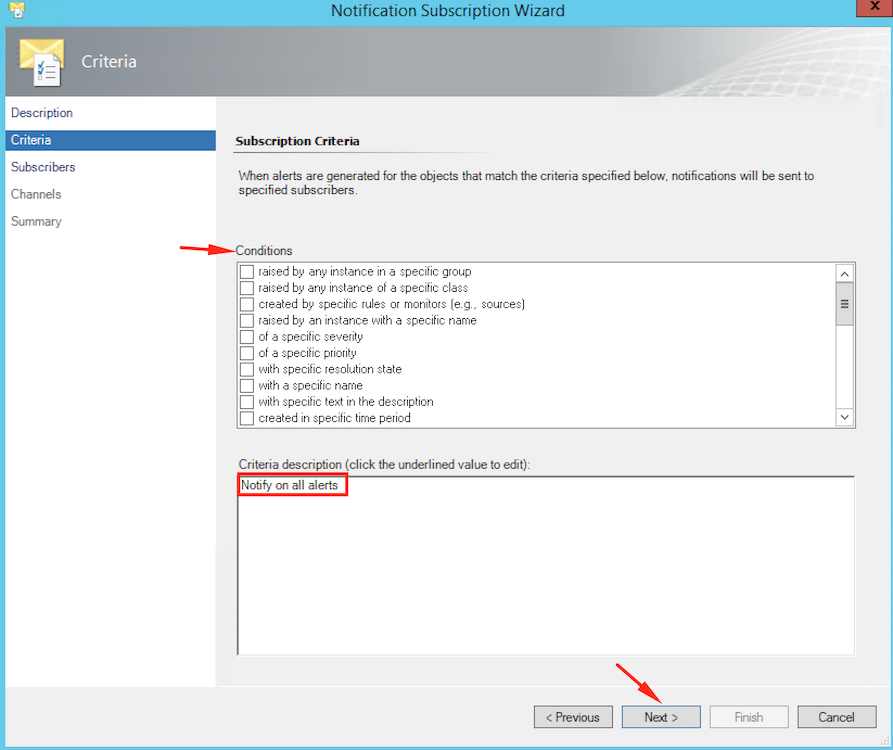
- For the "Criteria" step, select the conditions under which SCOM alert updates are forwarded to Opsgenie. In this case, notice "Notify on all alerts" in the "Criteria description" field. Click Next.
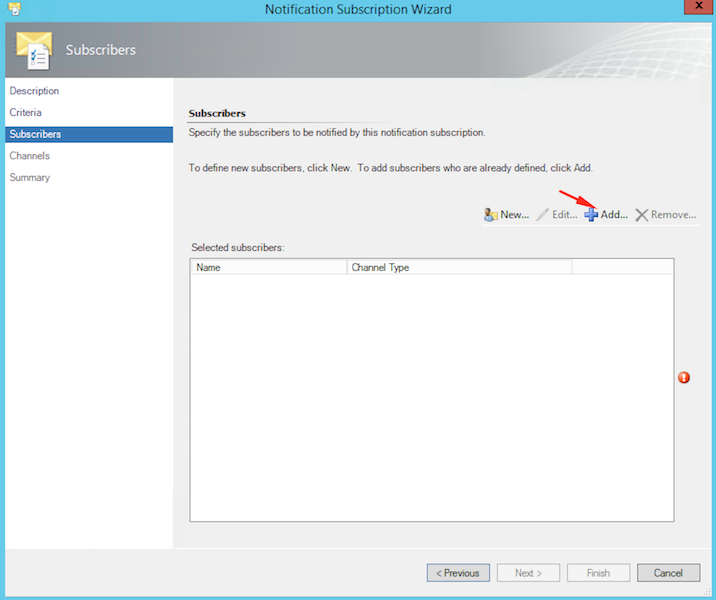
- For the "Subscribers" step, click Add to add a new subscriber.
- For the "Subscriber Search" screen, write Opsgenie to the Filter by field and click Search.
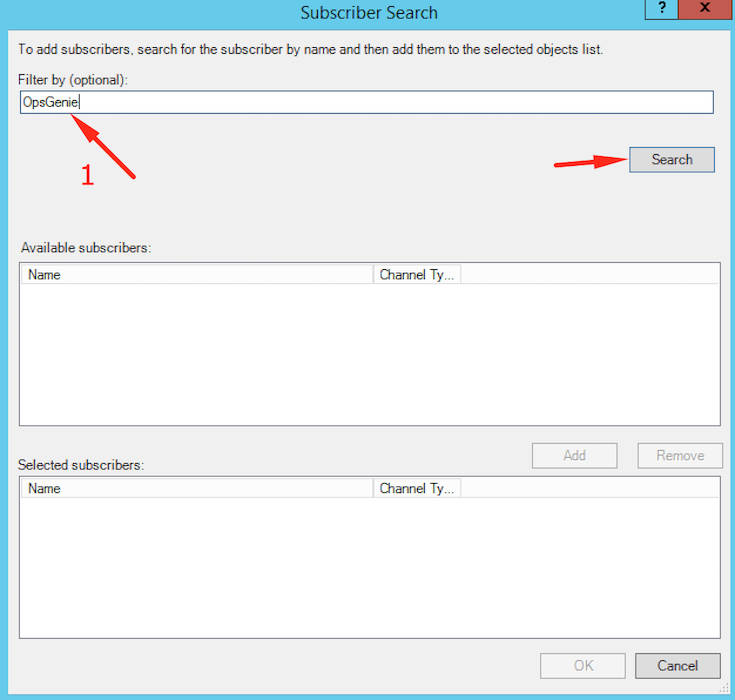
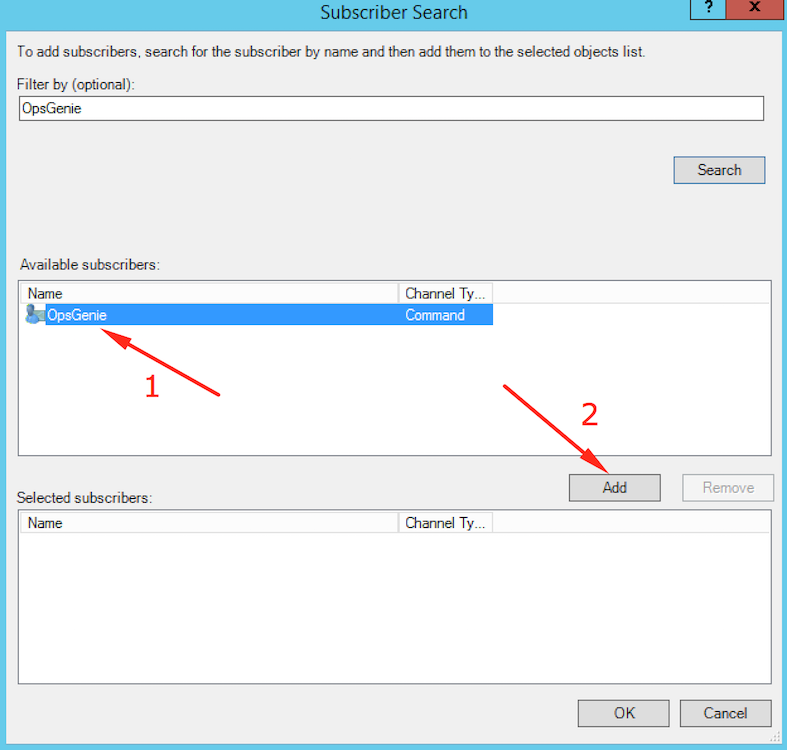
- Opsgenie will be listed under Available subscribers section. Click on Opsgenie and then click Add.
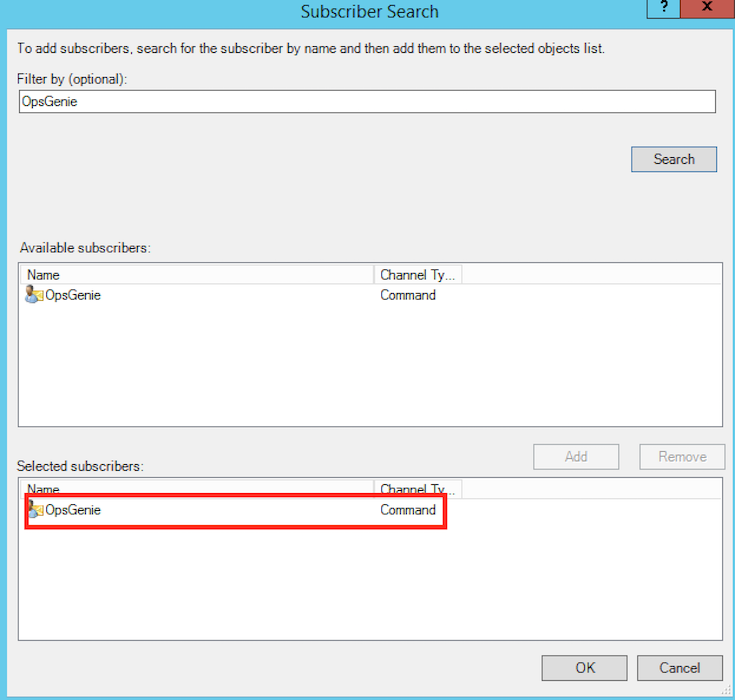
- You should see "Opsgenie" under "Selected subscribers" section. Click OK.
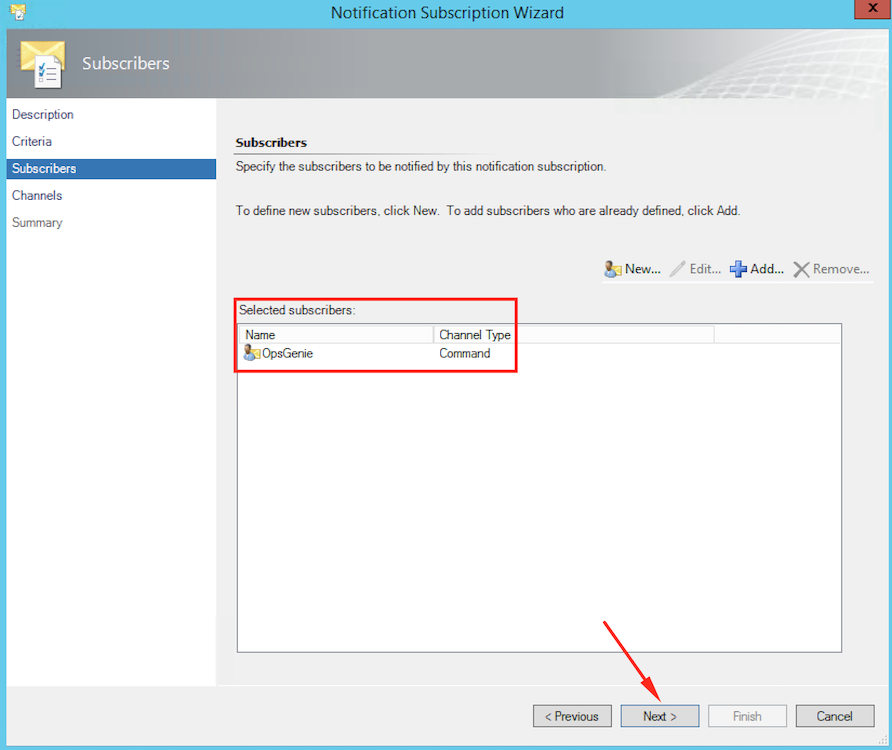
- Return to "Notification Subscription Wizard" and "Opsgenie" will be listed under "Selected subscriber" section. Click Next.
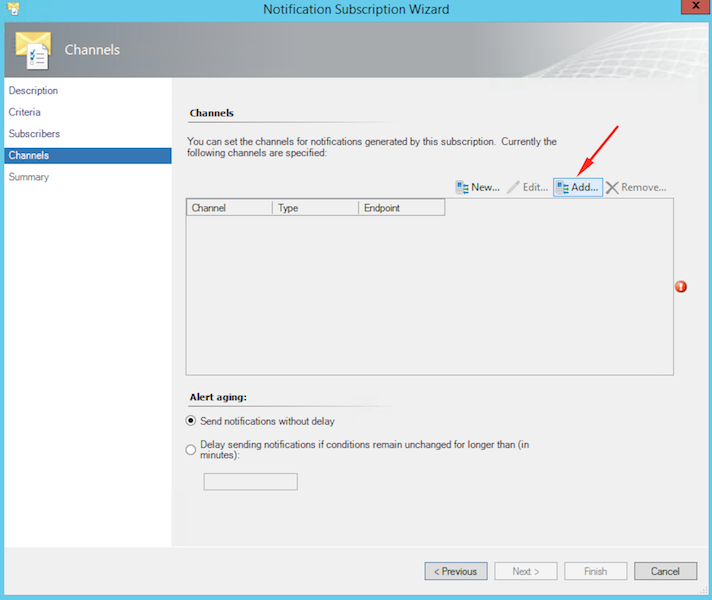
- On "Channels" step; click Add to add the notification channel that we have created before.
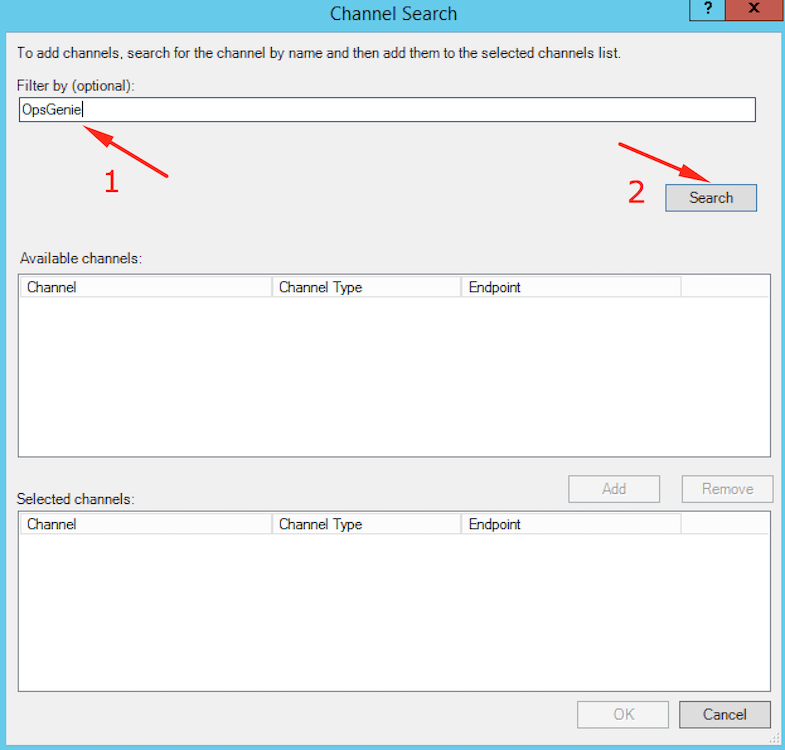
- On "Channel Search" screen; write Opsgenie in the "Filter by" field and click Search.
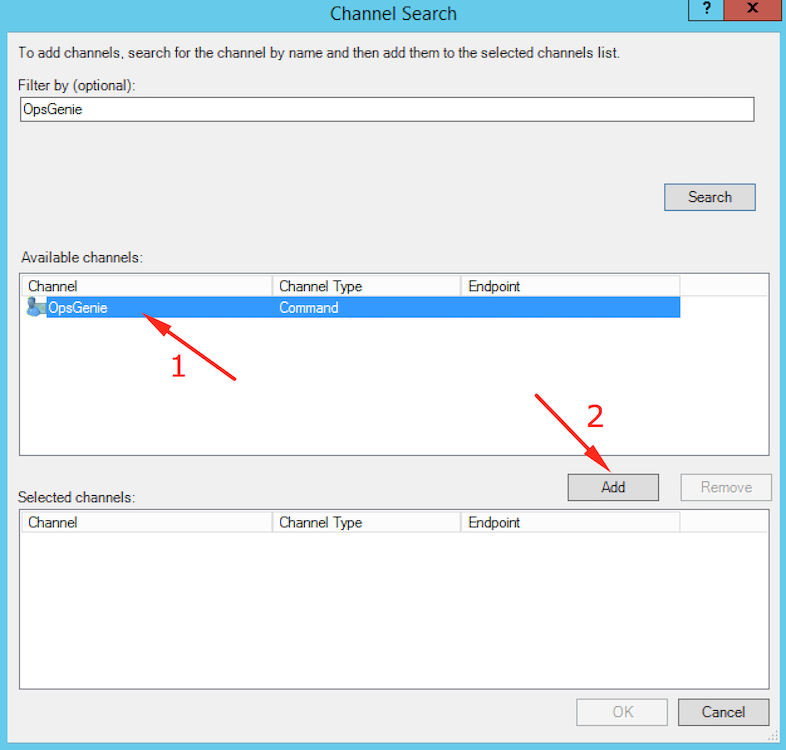
- List Opsgenie under the "Available channels" section. Click on Opsgenie and then click Add.
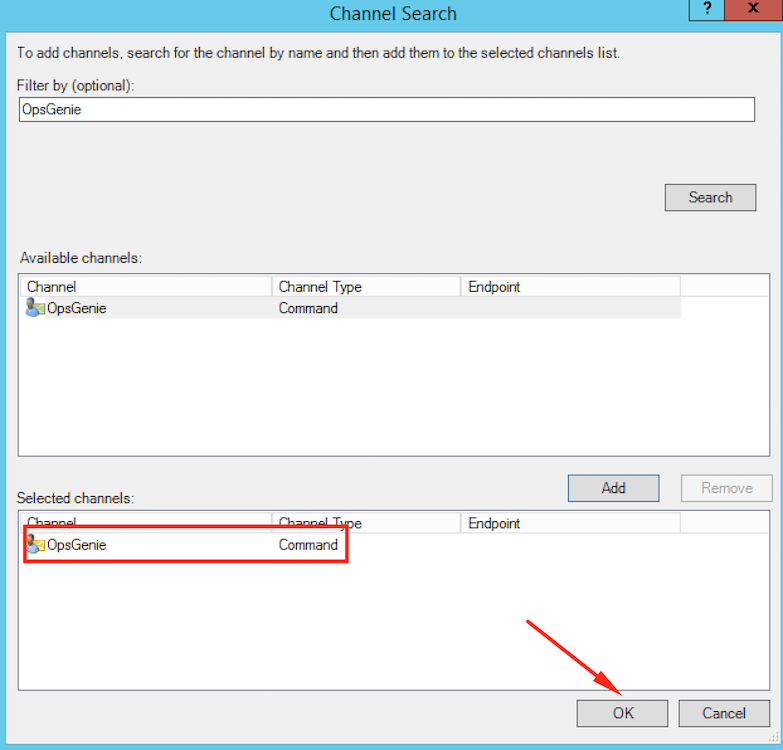
- Opsgenie appears under Selected channels section. Click OK.
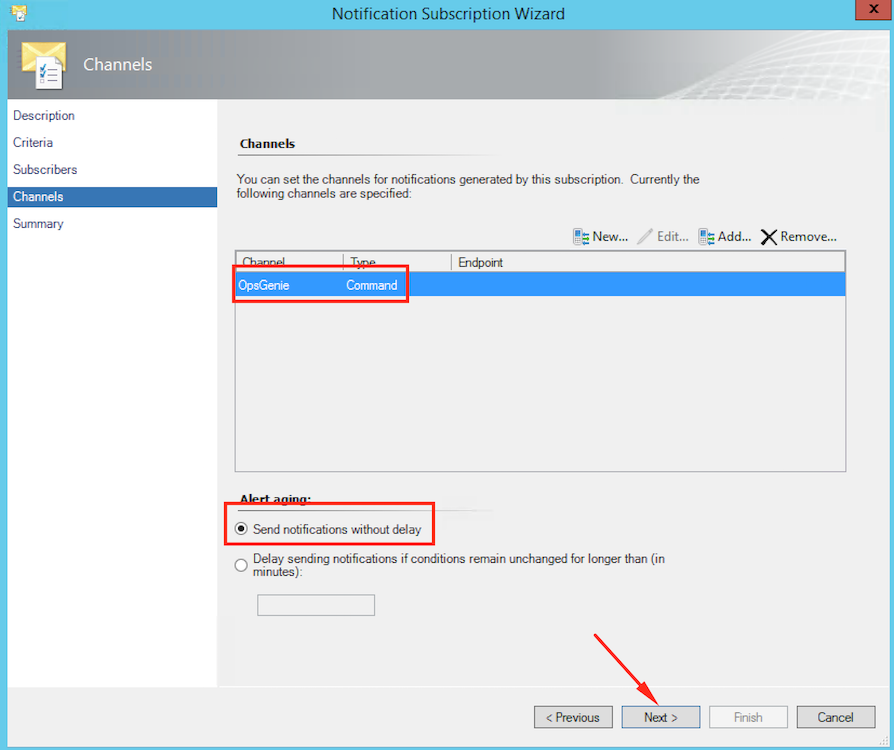
- Return to "Notification Subscription Wizard" and "Opsgenie" is listed under "Channels" section. Select Send notifications without delay and click Next.
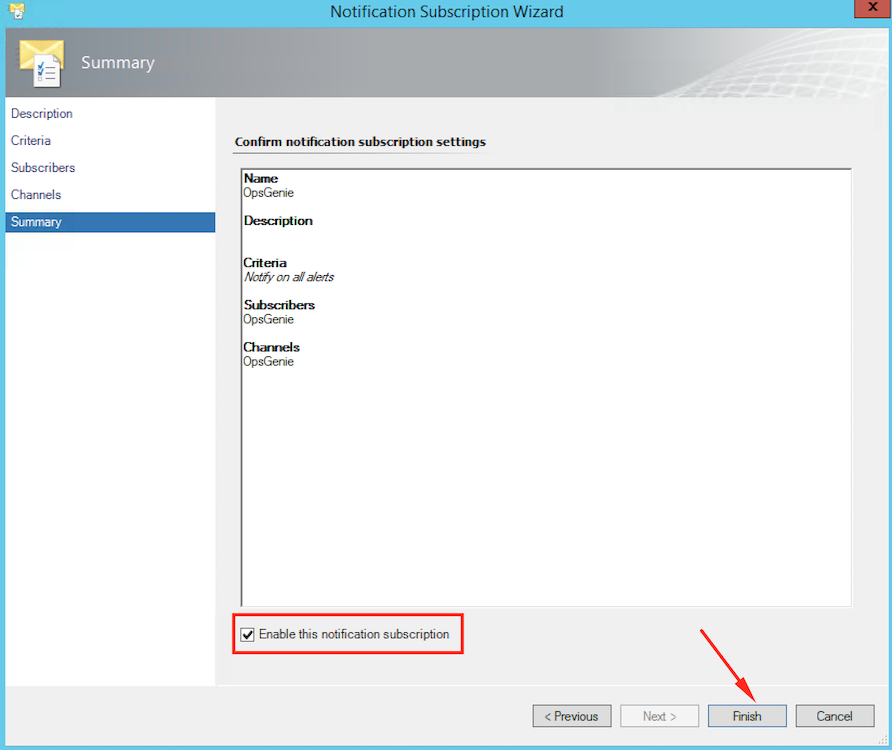
- Review the notification subscription settings and make sure that Enable this notification subscription option is checked. Click Finish.
- Setup for Microsoft SCOM integration with Opsgenie should now be completed.
Sample payload sent from SCOM to Opsgenie
{
  "owner": "np",
  "lastModified": "12/24/2015 11:47:16 AM",
  "resolutionState": "New",
  "timeRaised": "12/24/2015 11:47:16 AM",
  "resolutionStateLastModified": "np",
  "workflowId": "{7eba60fd-b179-69a7-3897-47b6753601f2}",
  "category": "Custom",
  "alertId": "{2ba87d56-a7af-4b42-bdcc-eb18486bd8cd}",
  "alertName": "Alert for event 999",
  "priority": "1",
  "severity": "2",
  "createdByMonitor": "false",
  "repeatCount": "0",
  "alertDescription": "np",
  "managedEntitySource": "WIN-RQTU8UB5TU5.opsgeniescom.com"
}
Sample alert

Updated 8 months ago
