Nagios Plugin
Opsgenie Nagios integration plugin utilizes full capabilities of Opsgenie and provides bi-directional integration with Nagios. Integration leverages Opsgenie's Nagios-specific executable and Marid utility to automatically create rich alerts (alert histogram, trends, etc.) and synchronizes alert status between Nagios and Opsgenie.
Functionality of the integration
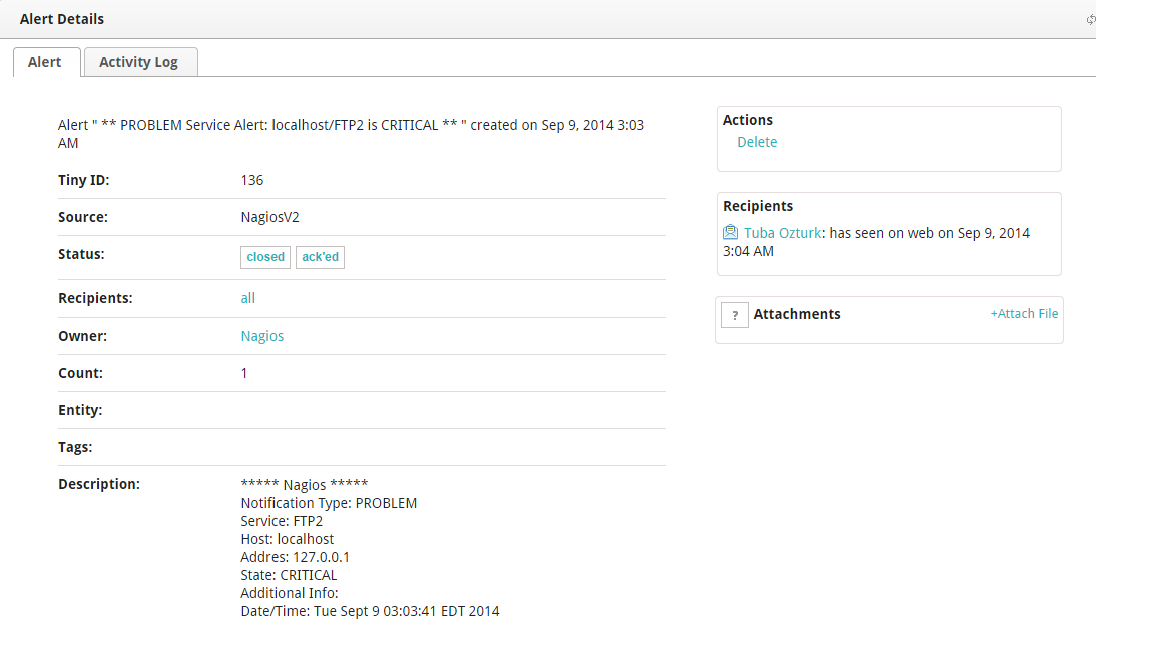
- When a host or service state becomes down in Nagios, an alert is created in Opsgenie.
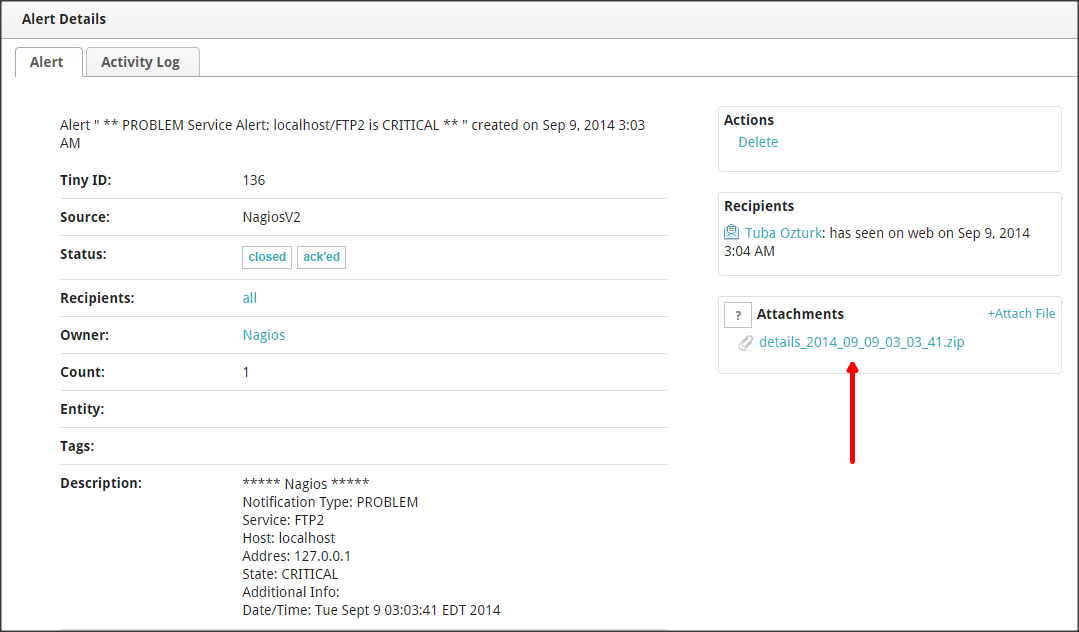
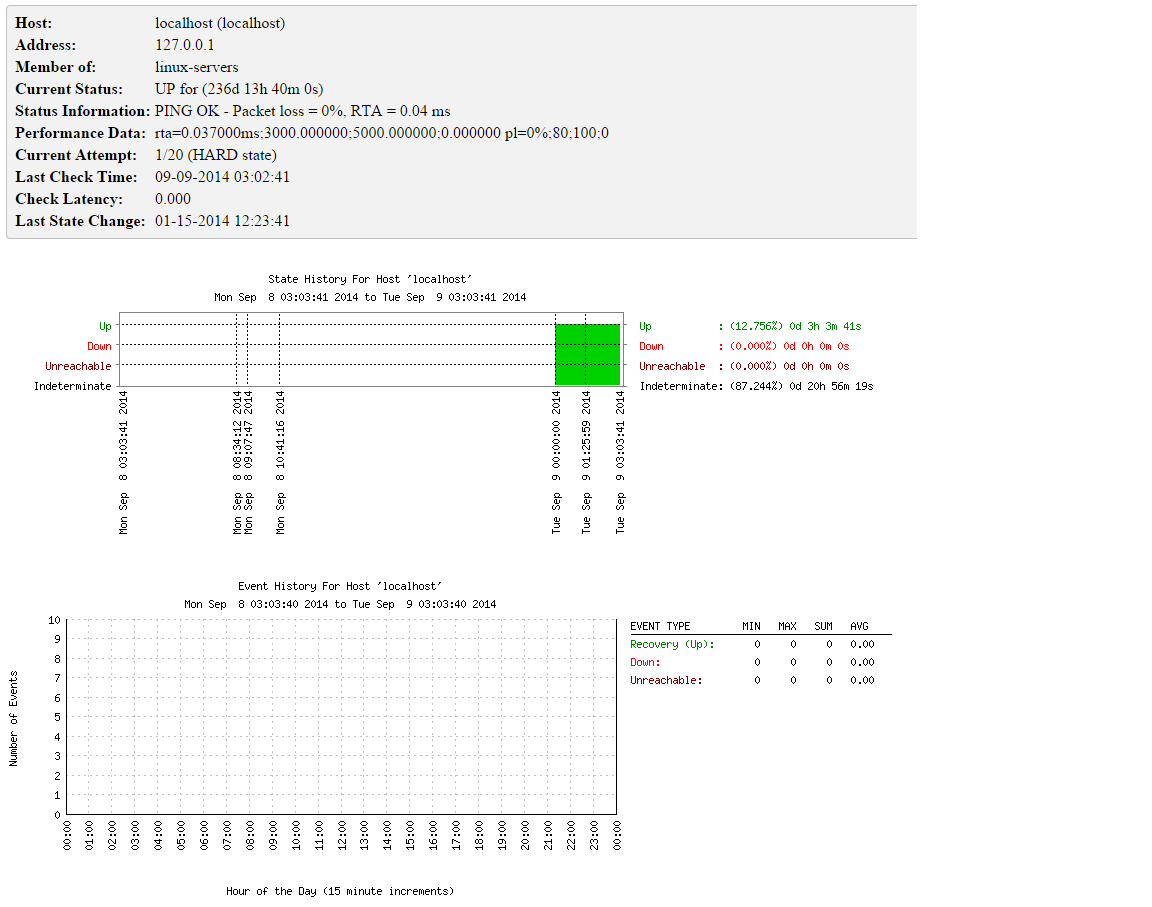
- Upon creation of the new alert, related histogram and trends images from Nagios is attached to the alert automatically.
- When the Opsgenie alert is acknowledged, the alert in Nagios is also acknowledged automatically, and vice versa.
- When a note is added to the Opsgenie alert, the alert in Nagios is also updated automatically, and vice versa.
Access the previous version of Nagios Integration documents from Lamp based Nagios Integration page.
Installation
The steps below describe how to integrate Opsgenie and Nagios using Opsgenie Nagios integration plugin. Slightly alter these instructions depending on the exact Linux distribution and Nagios configuration.
If Lamp based Nagios plugin is being used, backup all existing configurations. Uninstall the old plugin, then install the new one.
Prerequisites
Packages provided support the following systems:
- Red Hat based Linux distributions
- Debian based Linux distributions
Download Opsgenie Nagios Plugin
For Red Hat Based Distributions
- Download Opsgenie Nagios (Linux RPM)
- Run the following command:
rpm -i opsgenie-nagios-<your_version>.rpm
During upgrades, rpm package does not overwrite your existing configurations. It saves the new default configuration file as opsgenie-integration.conf.rpmnew. Find more information about rpm upgrade config file handling from here.
To update from version 201X-XX-XX to 2.X.X, you must add --force parameter. E.g.:
rpm -U --force opsgenie-integration-<your_version>.rpmWe suggest backing up your configuration files before update!
For Debian Based Distributions
- Download Opsgenie Nagios (Linux DEB)
- Run the following command:
dpkg -i opsgenie-nagios-<your_version>.deb
Add Nagios integration in Opsgenie
- Please create an Opsgenie account if you haven't done so already.
- Go to Opsgenie's Nagios Integration page..
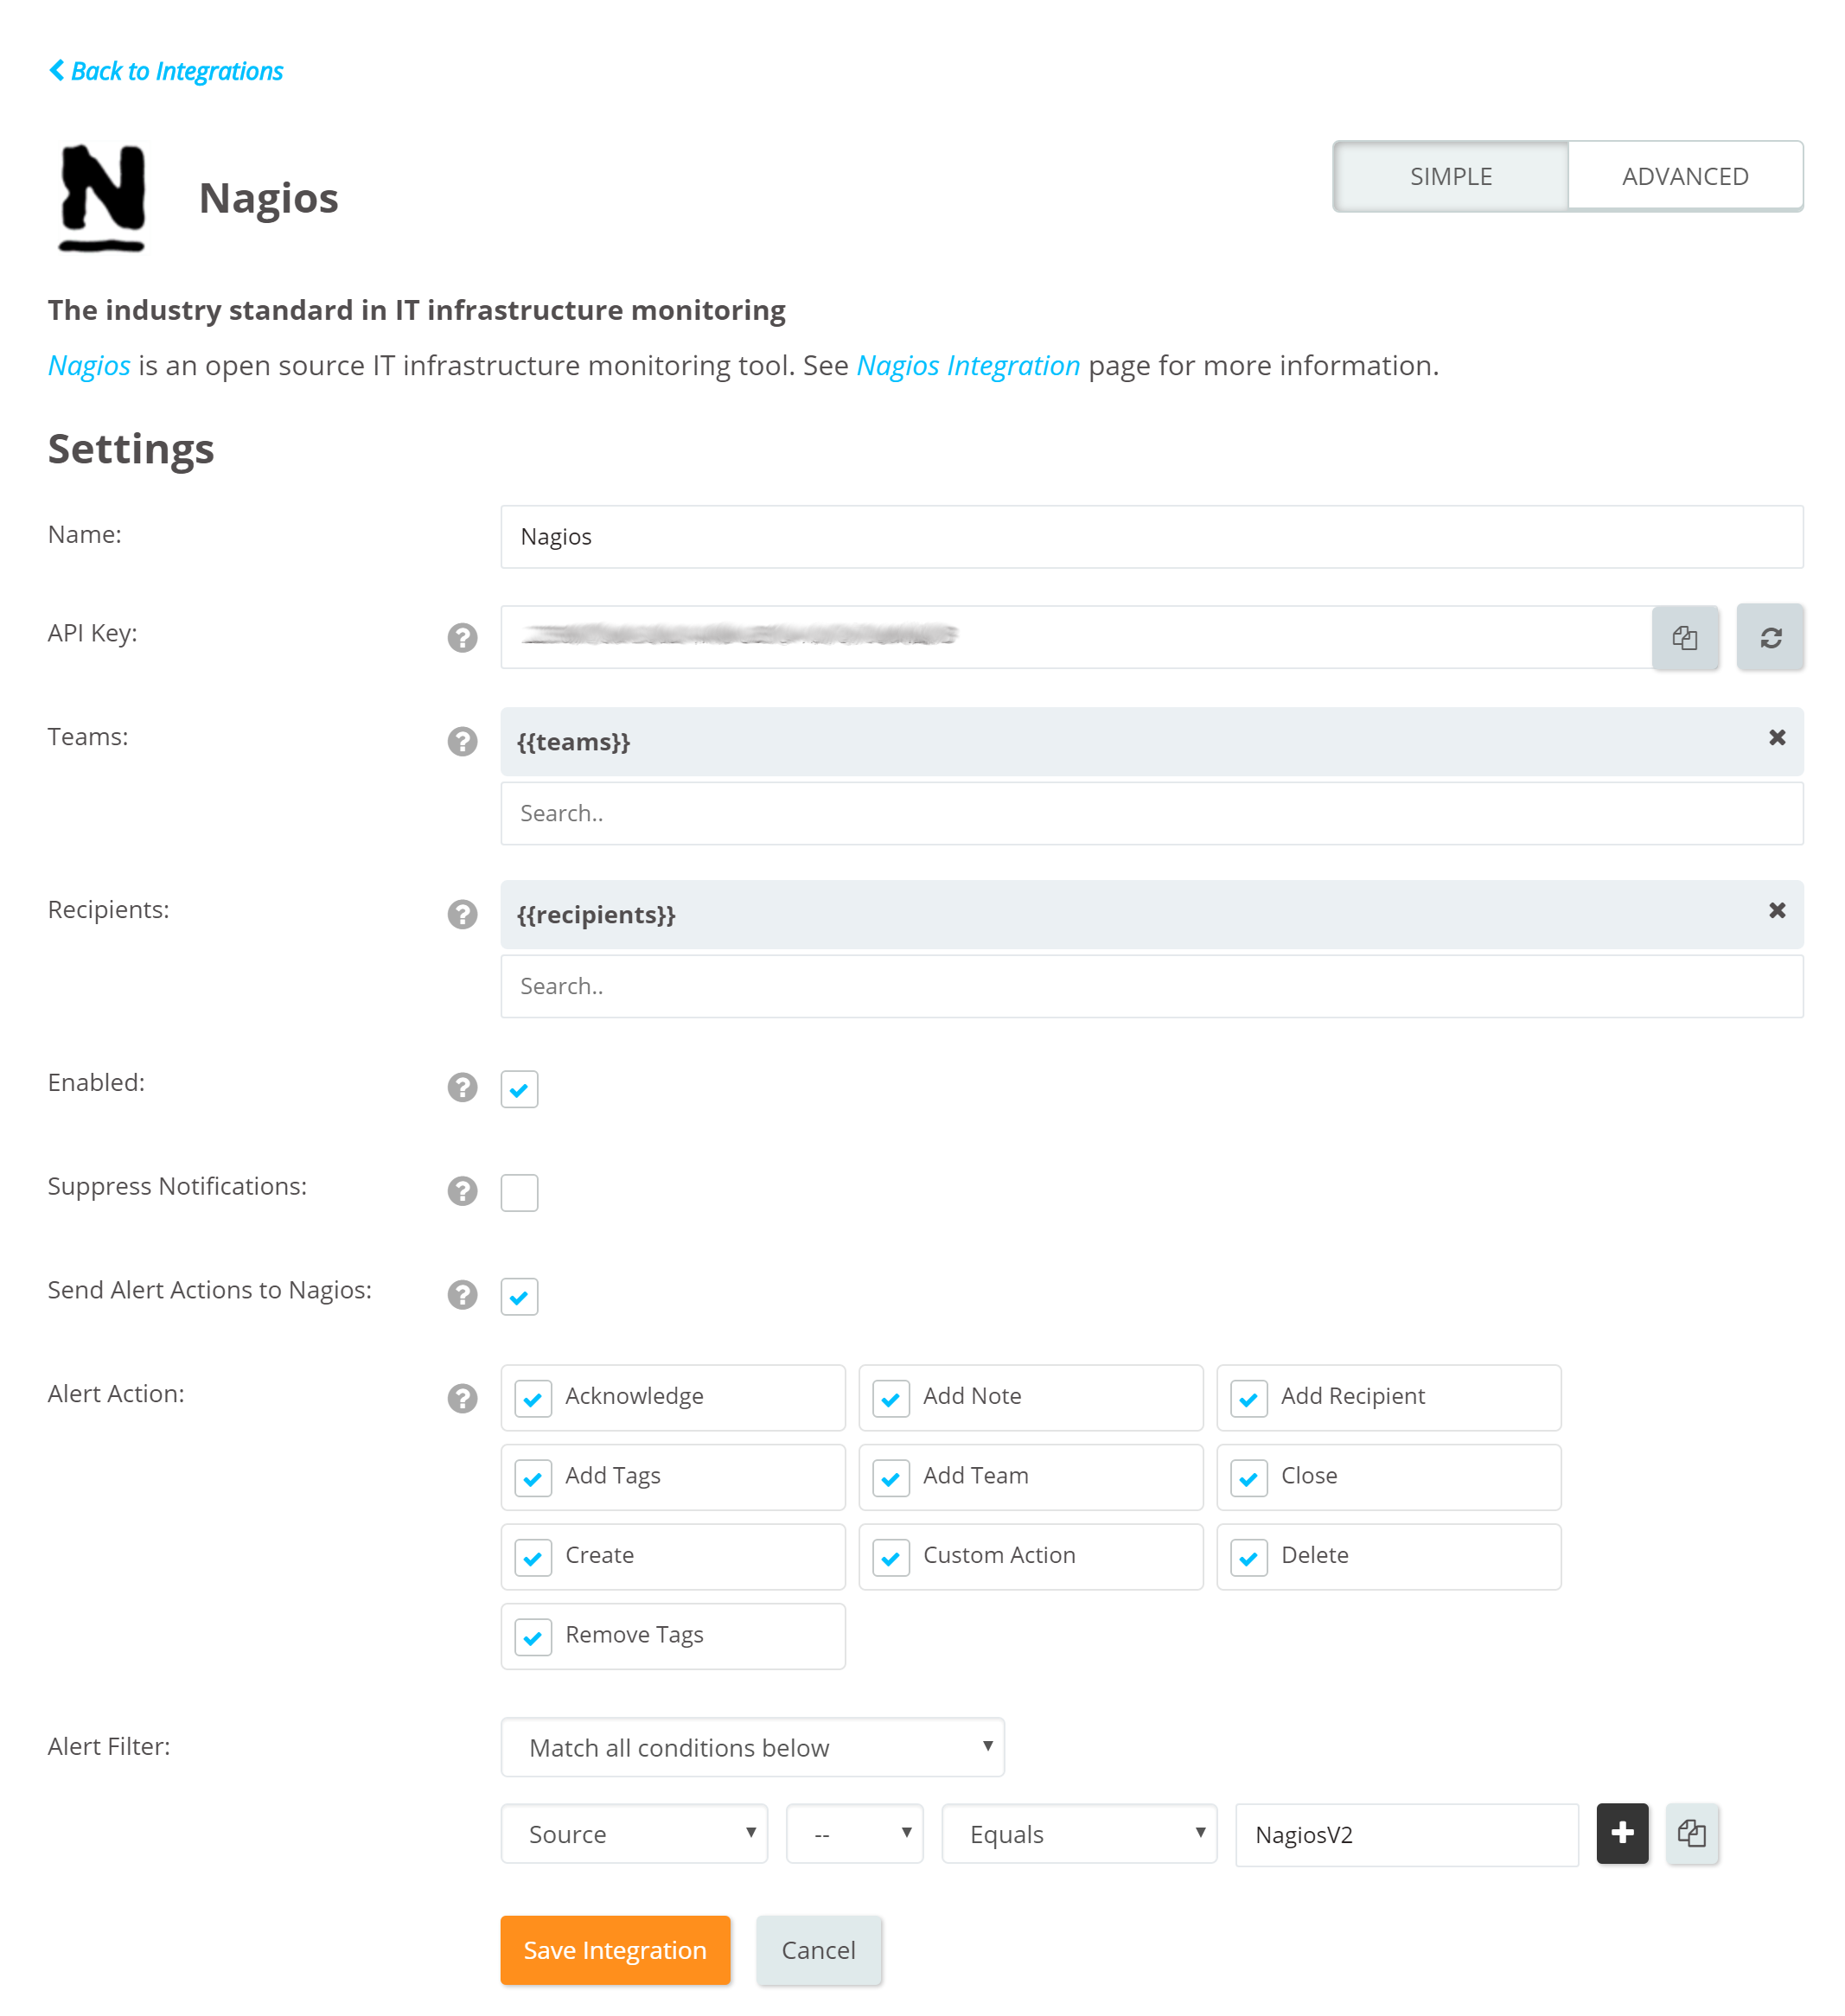
- Specify who is notified of Nagios alerts using the Teams field. Autocomplete suggestions are provided as you type.
- Copy the API key.
- Click Save Integration.

Opsgenie Plugin Configuration in Nagios
The plugin uses a golang-executable file (included in the plugin as nagios2opsgenie) to create, acknowledge, and close alerts in Opsgenie. Nagios should be configured to execute this file on events to create, acknowledge, and close alerts in Opsgenie.
Setting the apiKey is required. Other configuration parameters are set to defaults that work with most Nagios implementations but may need to be modified as well.
Configuration Parameters | Description | Mandatory to fill |
|---|---|---|
apiKey | Copy the API key from the Nagios integration you've created above. nagios2opsgenie uses this key to authenticate to Opsgenie. API key is also used to identify the right integration configuration that should be used to process alerts. | Yes |
recipients | Recipients field is used to specify who should be notified for the Nagios alerts. This field is used to set the default recipients field value. It can be modified to route different alerts to different people in Opsgenie Nagios integration, Advanced Settings page. Recipients can be set to users, groups, escalations or schedules who will be notified by Opsgenie. If you did not set recipients in the integration, this field is required. | Optional |
teams | Teams field is used to specify which teams should be notified for the Nagios alerts. This field is used to set the default teams field value. It can be modified to route different alerts to different teams in Opsgenie Nagios integration, Advanced Settings page. | Optional |
tags | Tags field is used to specify the tags of the alert that created in Opsgenie. | Optional |
nagios_server | nagios_server field is used to identify the Nagios server in Opsgenie, and only required when there are multiple Nagios servers. This field is used by Opsgenie when sending actions executed by users (acknowledge, close, etc.) back to your Nagios servers via Marid | Optional |
viaMaridUrl | viaMaridUrl field is used to send alerts to Opsgenie through Marid. You should enter host and port values of your working Marid.
| Optional |
logPath | Specifies the full path of the log file. (Default value is /var/log/opsgenie/nagios2opsgenie.log) | Optional |
nagios2opsgenie.http.proxy.enabled | nagios2opsgenie.http.proxy.enabled field is to enable/disable external proxy configuration. The default value is false. | Optional |
nagios2opsgenie.http.proxy.host | It is the host of the proxy. | Optional |
nagios2opsgenie.http.proxy.port | It is the port of the proxy. | Optional |
nagios2opsgenie.http.proxy.scheme | It is the proxy connection protocol. It may be http or https depending on your proxy servers. Its default value is http. | Optional |
nagios2opsgenie.http.proxy.username | It is the Proxy authentication username. | Optional |
nagios2opsgenie.http.proxy.password | It is the Proxy authentication password. | Optional |
There are three ways to configure golang-executable file:
1.Configuring from conf file: Configure from /etc/opsgenie/conf/opsgenie-integration.conffile. Configuring from conf file overwrites the configurations made in the script.
2.Configuring by using Golang Flags: Configure by entering flags to command in the opsgenie.cfg file. Use -apiKey flag for apiKey and -ns flag for the nagios_server name. If you don't have multiple nagios servers, there's no need to define the Nagios server. Using flags overwrites all the other configuration methods mentioned above.
Configure the apiKey from the cfg file as follows:
define command {
    command_name    notify-service-by-opsgenie
    command_line    /usr/bin/nagios2opsgenie -apiKey="apiKey1" -entityType=service ...
}
When apiKey is added to the cfg file, it overrides the apiKey in the opsgenie-integration.conf file.
If you want to send additional custom arguments, you can add them after the flags as: customArgName1 customArgValue1 customArgName2 customArgValue2You can parse custom arguments by adding {{_payload.customArgName}} to wherever you need on the input fields.
For more information about using raw parameters please visit Dynamic Fields document.
- Configuring from script: You can configure apiKey and nagios_server from nagios2opsgenie.go script. If you use this option, you need to build the script again and put the new executable to /usr/bin directory. You can find information about the location of the nagios2opsgenie.go and how to build a go script in the "Source" section.
Define Nagios contacts
- Copy /etc/opsgenie/opsgenie.cfg config file, (configures a contact and its host and service notification commands) to /usr/local/nagios/etc/objects directory.
cp /etc/opsgenie/opsgenie.cfg /usr/local/nagios/etc/objects - Add following line to main Nagios configuration file (NAGIOS_HOME/etc/nagios.cfg)
...
cfg_file=/usr/local/nagios/etc/objects/opsgenie.cfg
...- Add the contact "opsgenie" to your Nagios configuration’s main contact group in NAGIOS_HOME/etc/objects/contacts.cfg file. If you’re using the default configuration, contacts.cfg, add "opsgenie" user to the "admins" contact group.
- Restart Nagios.
If everything goes well, alerts are visible in Opsgenie for every notification created in Nagios.

Configure Opsgenie to Nagios Integration (Optional)
If you are using Opsgenie Edge Connector instead of Marid, you can find the integration specific script and its sample config from here. For more information about OEC, please refer OEC Integration documentation
The plugin uses Marid utility (included in the plugin) to enrich alerts when they get created and to update the state of the them in Nagios when they get updated in Opsgenie. For example, when an alert is created in Opsgenie, Marid gets the details (histogram, trends etc.) from Nagios and attaches them to the alert. Also when users acknowledge an alert from their mobile devices using the Opsgenie app, alert gets acknowledged in Nagios, and when users add comments to alerts in Opsgenie, comments get posted to Nagios as well. Marid subscribes to alert actions in Opsgenie and reflects these actions on Nagios using Nagios CGIs.
To start Marid, run the following command: /etc/init.d/marid start
To stop Marid, run the following command: /etc/init.d/marid stop
Marid is a Java application; therefore requires the Java Runtime version 1.6+ Both the Open JDK and Oracle JVMs can be used.
In order to use this feature "Send Alert Actions To Nagios" checkbox should be enabled in Opsgenie Nagios Integration.
Ensure that JAVA_HOME environment variable is set. If it is not, you may set it by removing the comment at the begining of the following line in /etc/opsgenie/profile file and set JAVA_HOME to your JRE installation directory.
#JAVA_HOME=<path/to/JDK or JRE/install>
To execute actions in Nagios, Marid gets the configuration parameters from /etc/opsgenie/conf/opsgenie-integration.conf file.
Configuration Parameters | |
|---|---|
nagios.alert_histogram_image_url | Marid retrieves histogram images from Nagios using this URL. Localhost should be replaced with your nagios server address. |
nagios.trends_image_url | Marid retrieves trends images from Nagios using this URL. Localhost should be replaced with your nagios server address. |
nagios.command_url | URL to update Nagios alerts when alerts get acknowledged, commented, etc. |
nagios.user | Credentials to authenticate Nagios web server to get nagios histogram and trends images. |
nagios.http.timeout | Timeout duration in msecs to get Nagios histogram and trends images. |
Multiple Nagios Server Support
Marid can be configured to forward Opsgenie alert actions to multiple Nagios servers, in order to do so:
- On each Nagios Server, modify /etc/opsgenie/conf/opsgenie-integration.conf nagios_server config property value to a unique name.
- On Marid server, modify /etc/opsgenie/conf/opsgenie-integration.conf, Add commandurl, user, password configuration for each Nagios server.
- opsgenie-integration.conf has a commented sample configuration for multiple Nagios servers:
#nagios.server1.alert_histogram_image_url=http://nagiosHost:port/nagios/cgi-bin/histogram.cgi
#nagios.server1.trends_image_url=http://nagiosHost:port/nagios/cgi-bin/trends.cgi
#nagios.server1.command_url=http://nagiosHost:port/nagios/cgi-bin/cmd.cgi
#nagios.server1.user=nagiosadmin
#nagios.server1.password=admin
#nagios.server1.http.timeout=30000
If using Marid, rich alerts are populated with host or service current status information in Opsgenie for every notification created in Nagios.


For more information refer to Marid Integration Server and Callbacks docs. Please do not hesitate to get in touch with any questions, issues, etc.
Nagios integration package does not support SSL v1.0. If your Nagios Server has SSL v1.0, we suggest you to upgrade your SSL server.
FAQ and Troubleshooting
If you're having trouble getting the integration to work, please check if your problem is mentioned below, and follow our advice:
1- Nagios alerts are not getting created in Opsgenie:
Run the following test command from the shell. Check if the test alert is created in Opsgenie:
/usr/bin/nagios2opsgenie -entityType=host -t=PROBLEM -hs=DOWN -hn=test_host
"Trace/breakpoint trap" error: It means the nagios2opsgenie plugin isn't compatible with the server distribution. Follow the "Source and Recompiling nagios2opsgenie" section below and rebuild your nagios2opsgenie.go according to your specific server environment.
If the alert is created in Opsgenie: It means the integration is installed correctly. The problem might be that Nagios is not notifying the Opsgenie contact for alerts. Check your Nagios alert notifications log.
If not: Check the logs at /var/log/opsgenie/nagios2opsgenie.log. Look for the following errors in the log file:
"RestException[Could not authenticate.]": if visible in the logs, it means Opsgenie couldn't identify the API key. Check that the API key correctly, as explained in "Opsgenie Plugin Configuration in Nagios" above.
 "Could not execute this action with apiKey of [Nagios] integration": if visible in the logs, the wrong integration package may have been downloaded. Make sure to download the Nagios integration package, not NagiosXI or any other.
- If some other problem, set the plugin's log level to debug, try again and send the logs to us at [email protected].
If there is no /var/log/opsgenie/nagios2opsgenie.log file, or there are no logs in it, check the following:
- First, make sure the nagios user has permission to write to /var/log/opsgenie directory. The installation package should automatically do this for you. If you encounter problems, execute:
chown -R nagios:opsgenie /var/log/opsgenie - Now check your Nagios server logs at /usr/local/nagios/var/nagios.log. See if there are error logs regarding nagios2opsgenie, and contact us with them.
Setting nagios2opsgenie plugin's log level to DEBUG:

Change the line nagios2opsgenie.logger=warning to nagios2opsgenie.logger=debug in /etc/opsgenie/conf/opsgenie-integration.conf file.
2- The Nagios alert is not acknowledged when you ack the alert at Opsgenie:
- First, check your alert logs.
- If you don't see the "Posted [Acknowledge] action to Nagios.." log, it means Opsgenie didn't send the Acknowledge action to Nagios. Check your integration configuration, it might not have matched the alert action.
- If you're seeing "Executed [Acknowledge] action via Marid with errors." log, it means the nagiosActionExecutor.groovy script in your Marid has encountered an error. Check the logs at /var/log/opsgenie/marid/script.log for error logs.
- If you only see the "Posted [Acknowledge] action to Nagios.." log and no related log after that, it might mean Marid is having connection problems. Check the logs at /var/log/opsgenie/marid/Marid.log for error logs.
- If you can't make sense of the problem, set the Marid's script log level to debug, try again and send the /var/log/opsgenie/marid/script.log file to us at [email protected].
Setting Marid's script log level to DEBUG:

Change the line log4j.logger.script=WARN, script to log4j.logger.script=DEBUG, script in /etc/opsgenie/marid/log.properties file. Then, restart Marid service.
3- Marid is causing memory leak, or using up too much RAM:
Change the line log4j.rootLogger=WARN, marid to log4j.rootLogger=DEBUG, marid in /etc/opsgenie/marid/log.properties file. Then, restart Marid service and send the /var/log/opsgenie/marid/Marid.log file to us at [email protected] so we can analyze further.
Configuring multiple Nagios Servers
If you do not want to use multiple Nagios servers please make sure that nagios_server variable is set to default in the configuration file.
To use multiple servers, set the nagios_server variable to server's name. For example; nagios_server:server1 and configure the Nagios variables as in the following:
nagios.server1.alert_histogram_image_url=http://nagiosHost:port/nagios/cgi-bin/histogram.cgi
nagios.server1.trends_image_url=http://nagiosHost:port/nagios/cgi-bin/trends.cgi
nagios.server1.command_url=http://nagiosHost:port/nagios/cgi-bin/cmd.cgi
nagios.server1.user=nagiosadmin
nagios.server1.password=admin
nagios.server1.http.timeout=30000
Source and Recompiling nagios2opsgenie
The source for the executable nagios2opsgenie is located under /usr/bin/ and nagios2opsgenie.go is located under /etc/opsgenie/ and is also available at GitHub Opsgenie Integration repository. To change the behavior of the executable, edit nagios2opsgenie.go and build it using:
go build nagios2opsgenie.go
Refer to http://golang.org/doc/install/source. Note that nagios2opsgenie is built for linux/amd64 systems.
Updated 8 months ago
