CloudMonix Integration
CloudMonix enhances Microsoft Azure by providing deep monitoring of most of Azure's infrastructure via live dashboards, ability to self-heal from many different production issues, on-demand historical performance & uptime reports, customizable alerts & notifications, auto-scaling engine, integration to third-party systems, and more.

What does Opsgenie offer CloudMonix users?
Opsgenie's CloudMonix integration enables CloudMonix users to take advantage of Opsgenie's advanced alert & notifications management capabilities such as escalations, on-call schedule management, and extensive alert notification controls.
Functionality of the integration
- When CloudMonix triggers an alert, an alert is created in Opsgenie automatically through the integration.
- When the check value of the alert is off in CloudMonix, Opsgenie closes the alert automatically.
Add CloudMonix Integration in Opsgenie
- Please create an Opsgenie account if you haven't done so already.
- Go to Opsgenie CloudMonix Integration page.
For Free and Essentials plans, you can only add the integrations from the Team Dashboards, please use the alternative instructions given below to add this integration.
- Specify who is notified of CloudMonix alerts using the Teams field. Auto-complete suggestions are provided as you type.
An alternative for Step 2) and Step 3) is to add the integration from the Team Dashboard of the team which will own the integration. To add an integration directly to a team, navigate to the Team Dashboard and open Integrations tab. Click Add Integration and select the integration that you would like to add.
- Copy the Webhook URL.
- Click Save Integration.
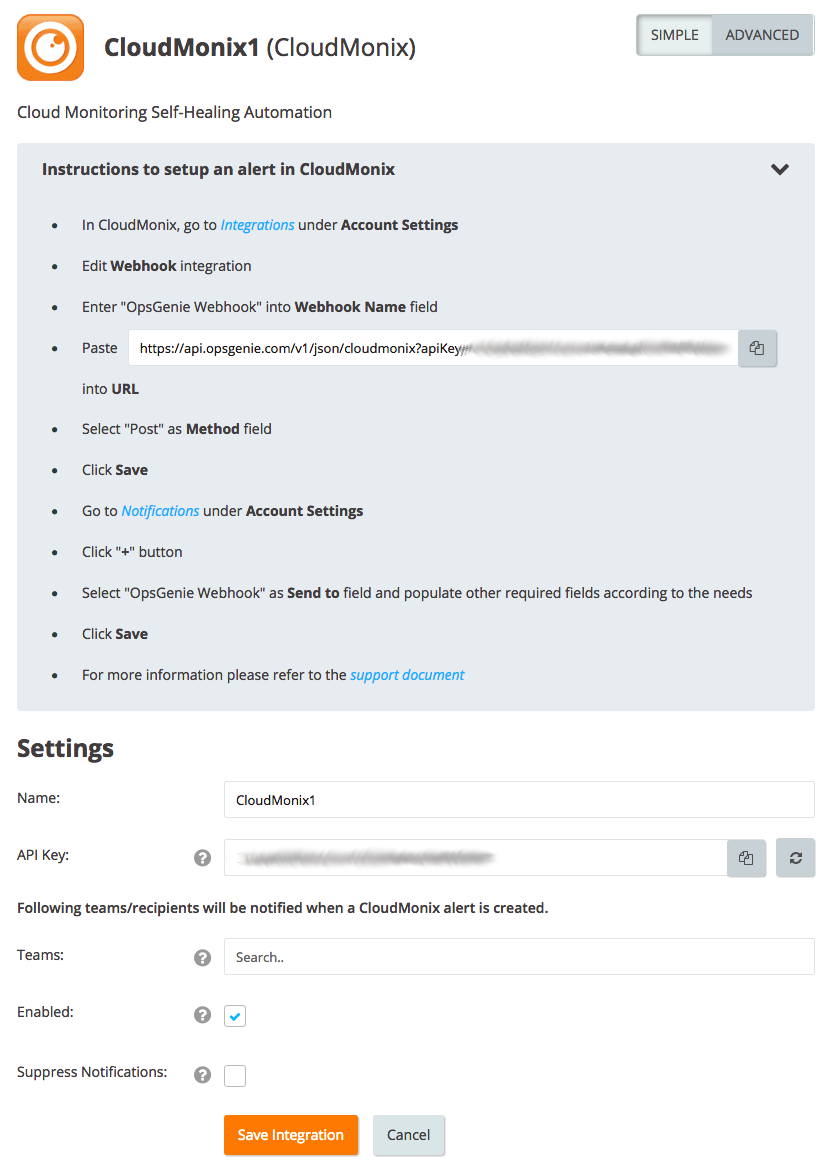
Configuration in CloudMonix
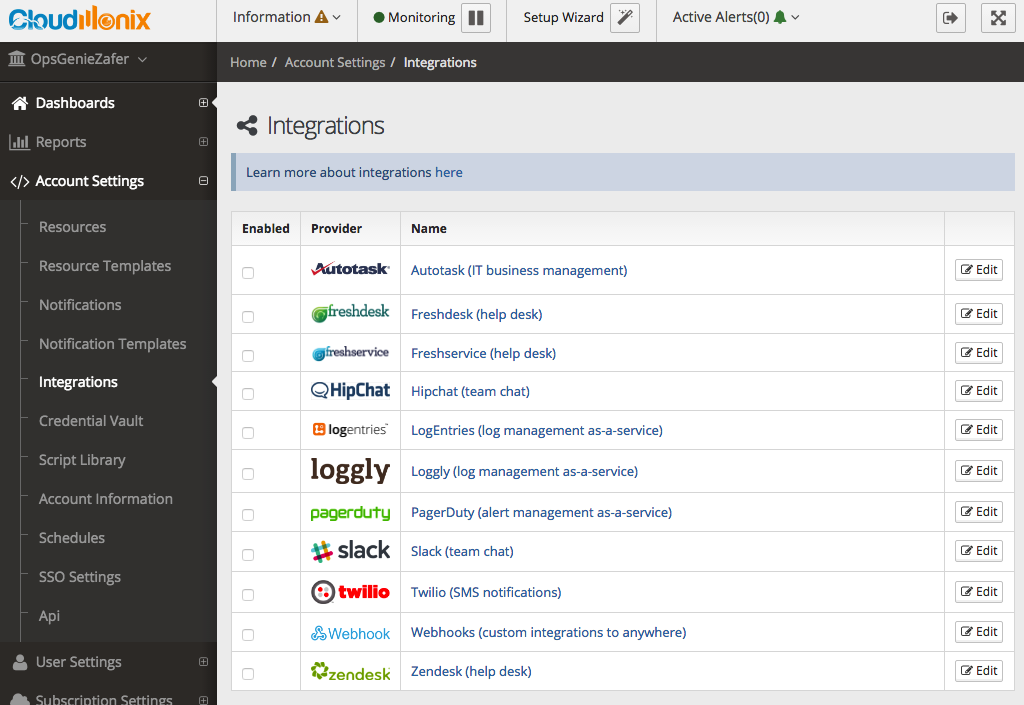
- In CloudMonix, go to Integrations under Account Settings.
- Edit Webhook integration.
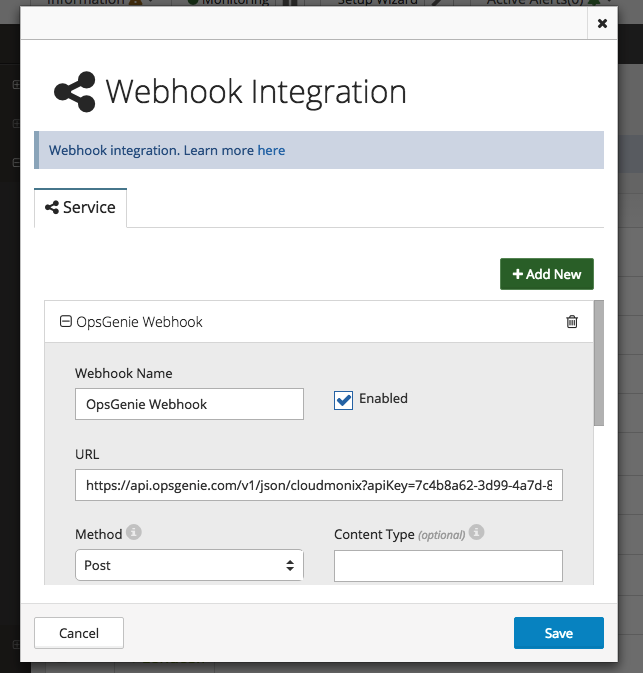
- Enter "Opsgenie Webhook" into Webhook Name field
- Paste integration API URL into URL.
- Select "Post" as Method field.
- Click Save.

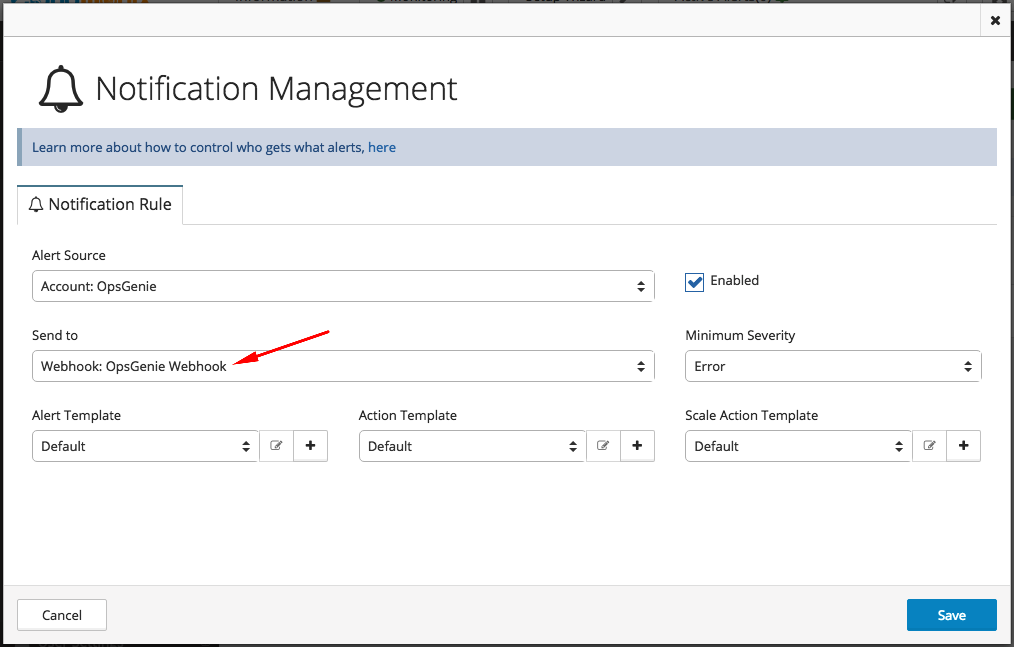
- Go to Notifications under Account Settings
- Click "+".

- Select "Opsgenie Webhook" as Send to field and populate other required fields as desired.
- Click Save.
Advanced Configuration Settings in Opsgenie
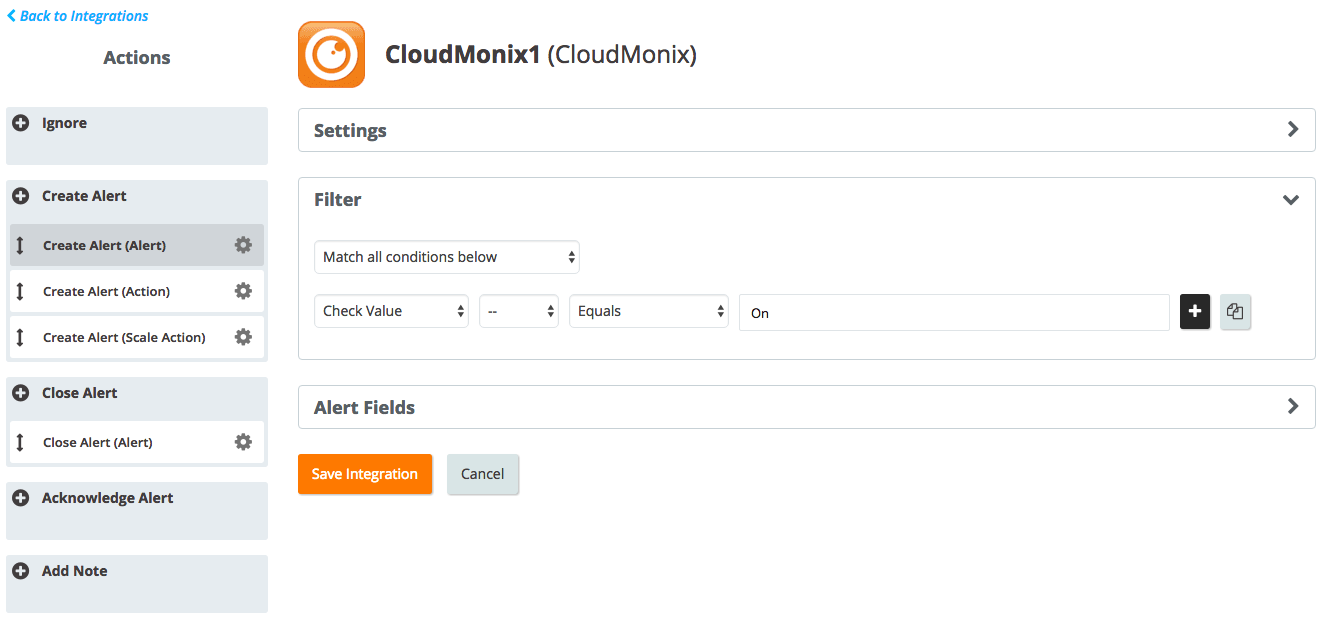
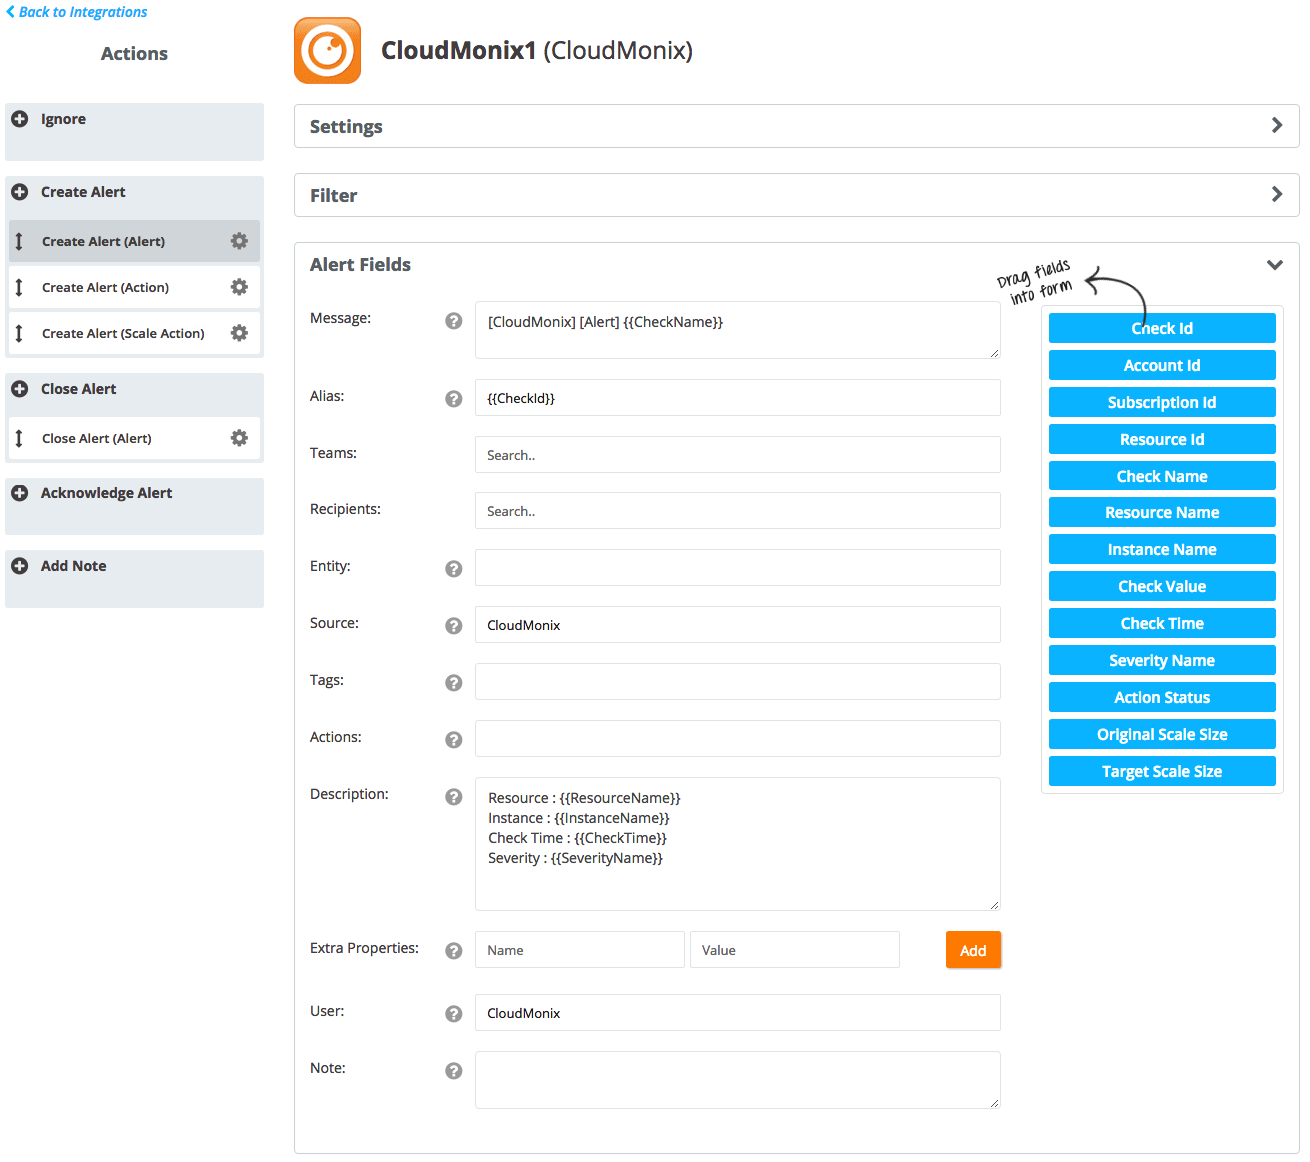
Sample payload sent from CloudMonix
{
"CheckId": "8db3297e-ed15-4218-9068-d99cf68aea20",
"AccountId": "ace8ae77-0450-4373-a63a-d6616cbe3224",
"SubscriptionId": "32a80186-7301-4500-93e0-3c9b16ec46c0",
"ResourceId": "145b9eb0-c145-4588-b8e7-210689aff0f2",
"CheckName": "Test Check Name",
"ResourceName": "Test Resource Alert",
"InstanceName": "",
"CheckValue": "Test Check Value",
"CheckTime": "6\/28\/2016 12:31:35 PM",
"SeverityName": "INFORMATION"
}
Sample alert

Updated 7 months ago
