AppOptics provides a simple Web API, as well as language bindings and integration with collection agents such as "statsd" and "collectd" to make it very easy to store metric data in AppOptics data store.
AppOptics create alerts in Opsgenie when configured thresholds for metrics are exceeded.
What does Opsgenie offer AppOptics users?
Opsgenie has a webhook integration with AppOptics. Use the integration to send AppOptic incidents to Opsgenie's API, with detailed information. Opsgenie acts as a dispatcher for AppOptics alerts, determines the right people to notify based on on-call schedules– notifies via email, text messages (SMS), phone calls and iOS & Android push notifications, and escalates alerts until the alert is acknowledged or closed.
Functionality of the integration
- When an alert is created in AppOptics, an alert is also created in Opsgenie automatically through the integration.
- When an alert is closed in AppOptics, the alert in Opsgenie is also closed.
Add AppOptics integration in Opsgenie
- Please create an Opsgenie account if you haven't done so already.
- Go to Opsgenie AppOptics Integration page.
For Free and Essentials plans, you can only add the integrations from the Team Dashboards, please use the alternative instructions given below to add this integration.
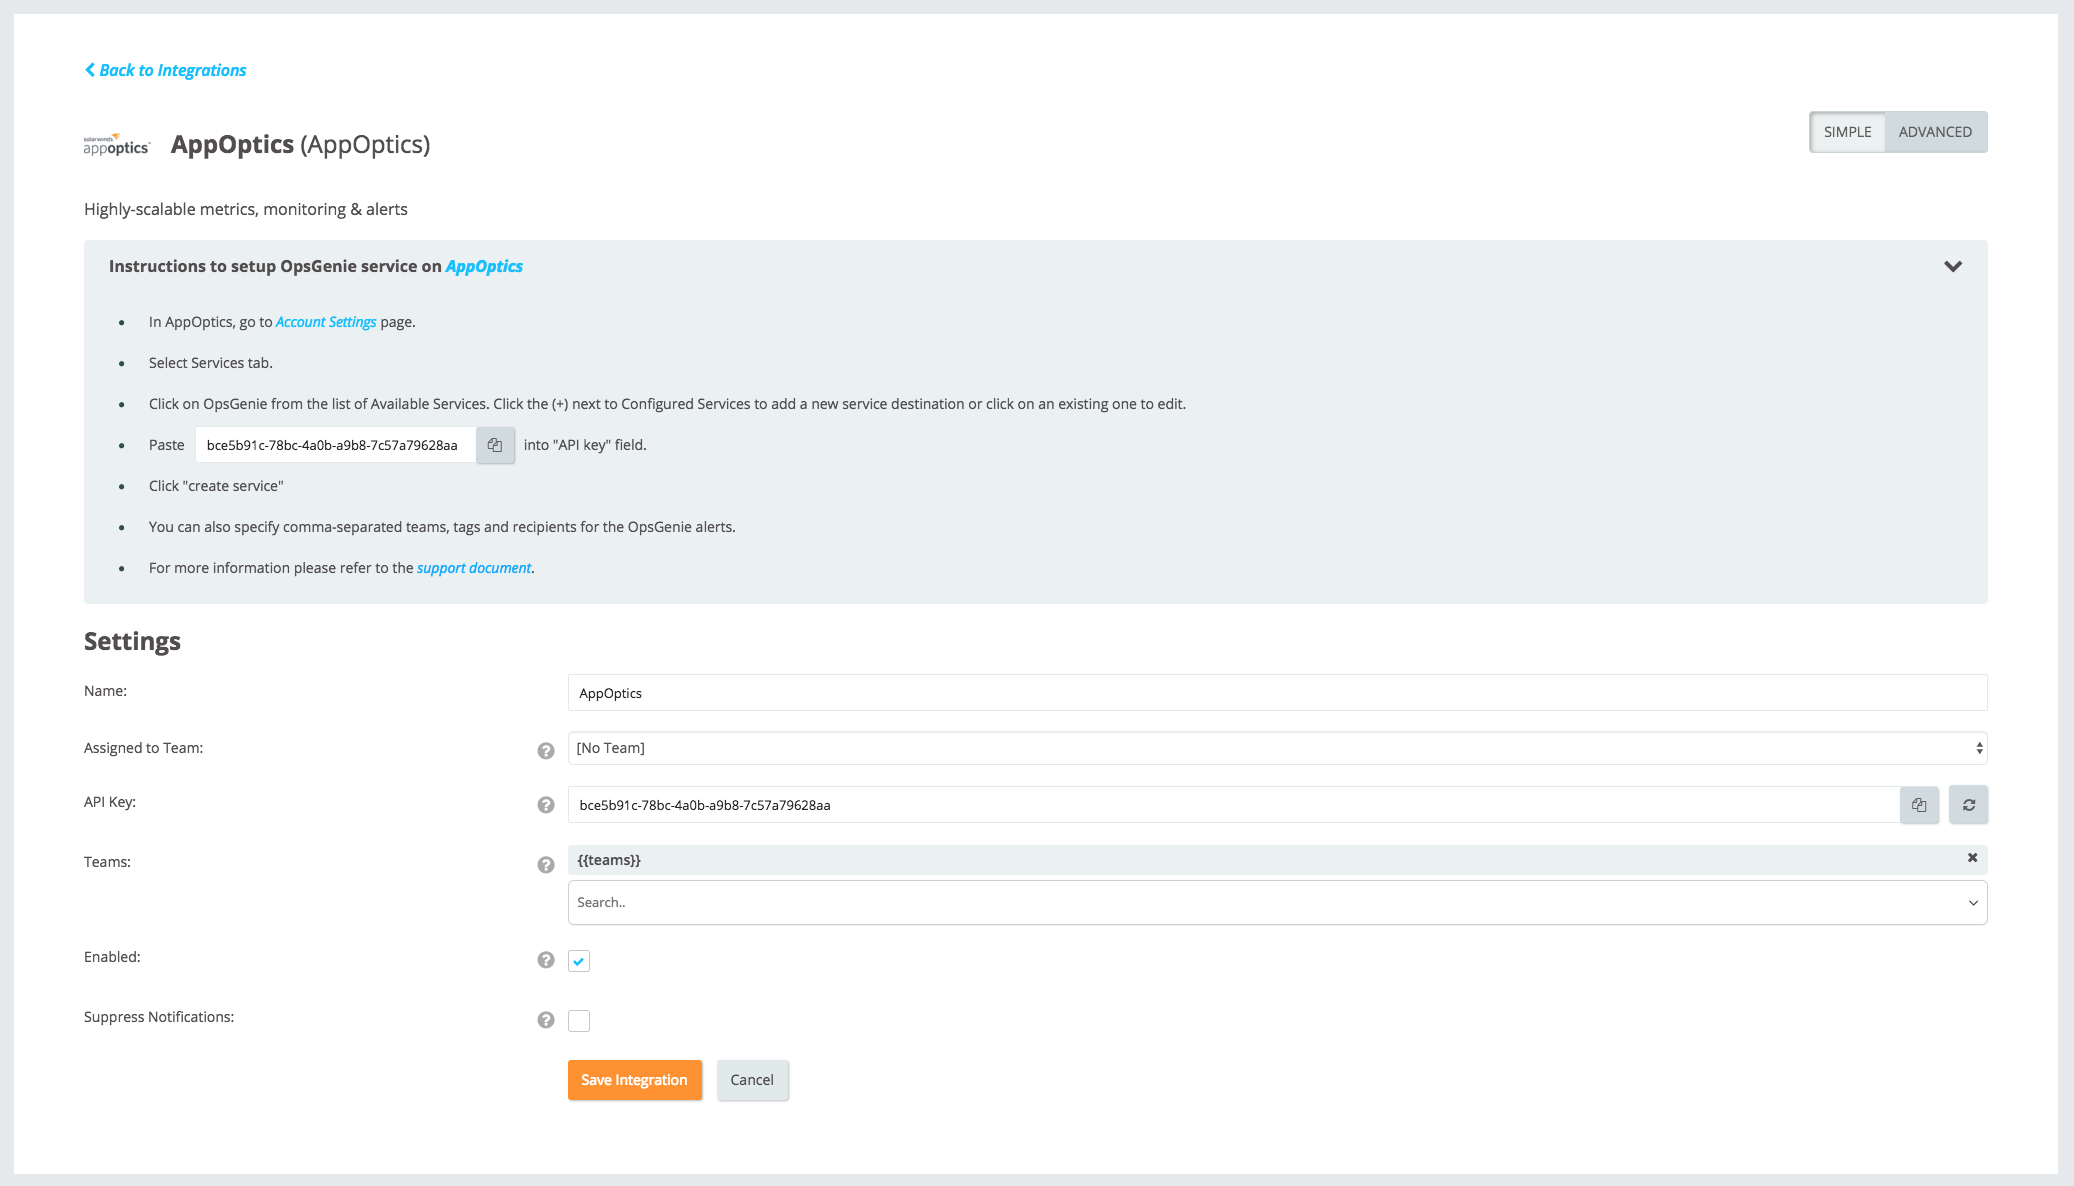
- Specify who is notified of AppOptics alerts using the Teams field. Auto-complete suggestions are provided as you type.
An alternative for Step 2) and Step 3) is to add the integration from the Team Dashboard of the team which will own the integration. To add an integration directly to a team, navigate to the Team Dashboard and open Integrations tab. Click Add Integration and select the integration that you would like to add.
- Copy the integration API Key by clicking on the copy button or selecting. This is used in AppOptics configuration.
- Click Save Integration.

Configuration on AppOptics
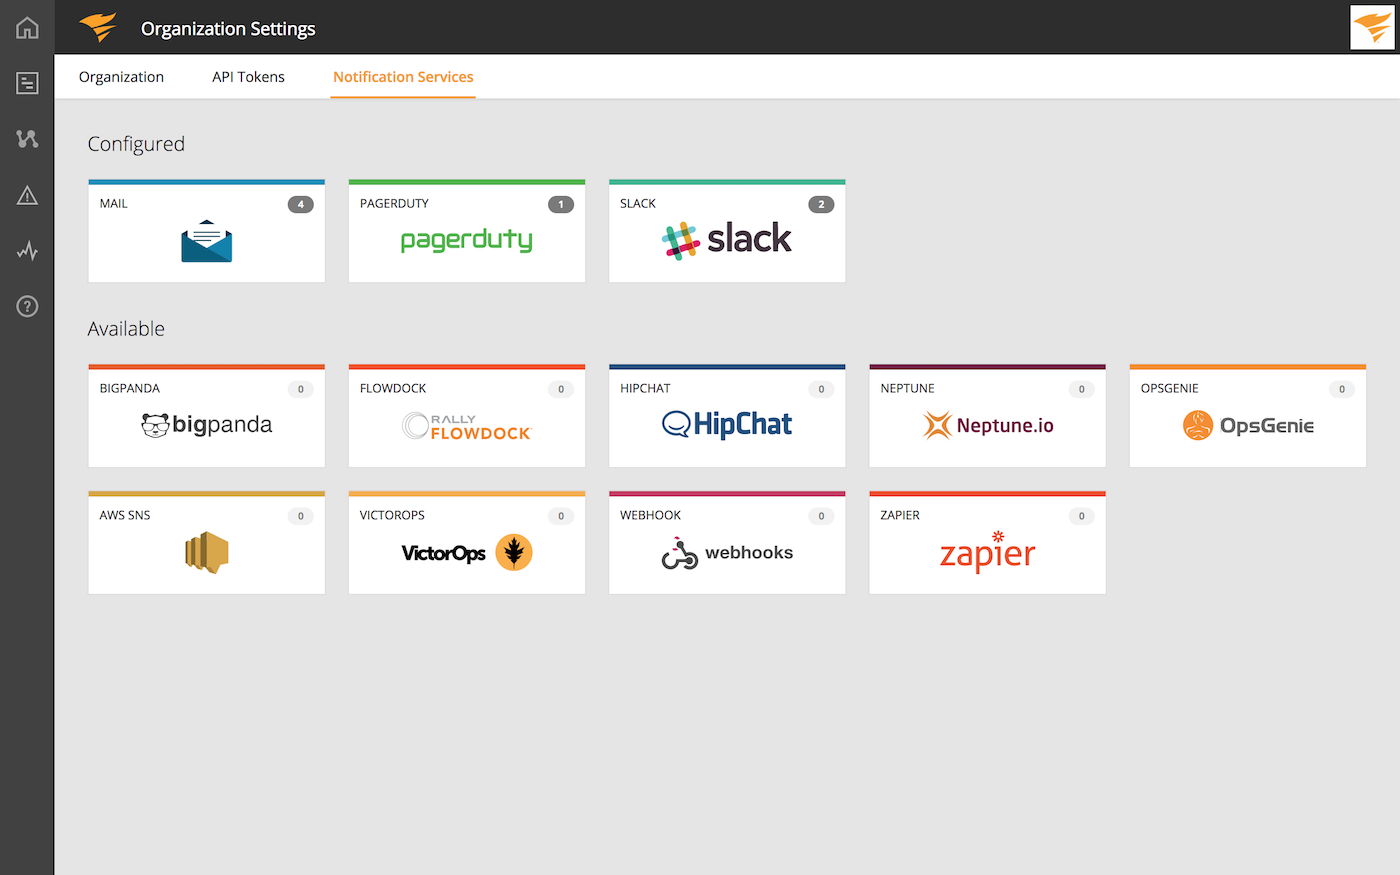
- In AppOptics, go to the Account Settings page.
- Select the Services tab.
- Click on Opsgenie from the list of Available Services. Click the (+) next to Configured Services to add a new service destination or click on an existing one to edit.
- Paste the API key you copied into "API key field.
- Click Create service.
- Specify comma-separated teams, tags, and recipients for the Opsgenie alerts.

You can also refer to AppOptics's support document for this integration.
Sample Payload
{
  "alert": {
    "id": 4892664,
    "name": "test alert",
    "runbook_url": "runbook.com",
    "version": 2,
    "description": "test alert"
  },
  "trigger_time": 1424793470,
  "conditions": [
    {
      "id": 611876,
      "type": "above",
      "threshold": 1,
      "duration": 60
    },
    {
      "id": 61187,
      "type": "average",
      "threshold": 2,
      "duration": 40
    }
  ],
  "violations": {
    "test-source": [
      {
        "metric": "cpu",
        "value": 43,
        "recorded_at": 1424793470,
        "condition_violated": 611876
      },
      {
        "metric": "metric1",
        "value": 51,
        "recorded_at": 1427793470,
        "condition_violated": 611876
      }
    ],
    "source" :[
      {
        "metric": "metric2",
        "value": 3,
        "recorded_at": 1624793470,
        "condition_violated": 611876
      }
    ]
  },

  "metric": {
    "name": "disk_read",
    "type": "gauge"
  },
  "measurement": {
    "value": 50,
    "source": "test-source"
  },
  "measurements": [
    {
      "value": 50,
      "source": "test-source"
    }
  ]
}
Updated 6 months ago
